Home Network
During the pandemic, I decided to phase out my traditional home network due to frequent connectivity issues around the house and the recurring modem/router rental fees. I upgraded to a more advanced, mini-enterprise-style setup to ensure a reliable, future-proof network for at least the next 10 years.
ISP Specifications
Comcast Xfinity: 1 Gbps Download / 40 Mbps Upload (Max available in area)
Hardware & Tools
Equipment List
- ■ NETGEAR Nighthawk Multi-Gig Cable Modem CM2000 (2.5Gbps)
- ■ Unifi Dream Machine Pro
- ■ UniFi Switch PRO 24 PoE
- ■ UniFi nanoHD Access Point
- ■ UniFi Protect G4-Bullet Camera (Outdoor)
- ■ G3 Instant (Indoor)
- ■ trueCable Cat 6 CMR Riser Unshielded 1000ft (Indoor)
- ■ trueCable Shielded Cat 6 Direct Burial 1000ft (Outdoor)
Installation Tools
- / RJ45 connectors & shielded external ground connector
- / Keystone jacks & wall plates
- / Wall mount patch panel 8U
- / 1U PDU
- / Klein Tools VDV427-300 Impact Punchdown Tool
- / Drywall Saw
- / Klein Tools VDV226-110 Ratcheting Modular Crimper
- / Optional: Cable management raceways
Core Setup
Unifi Dream Machine Pro
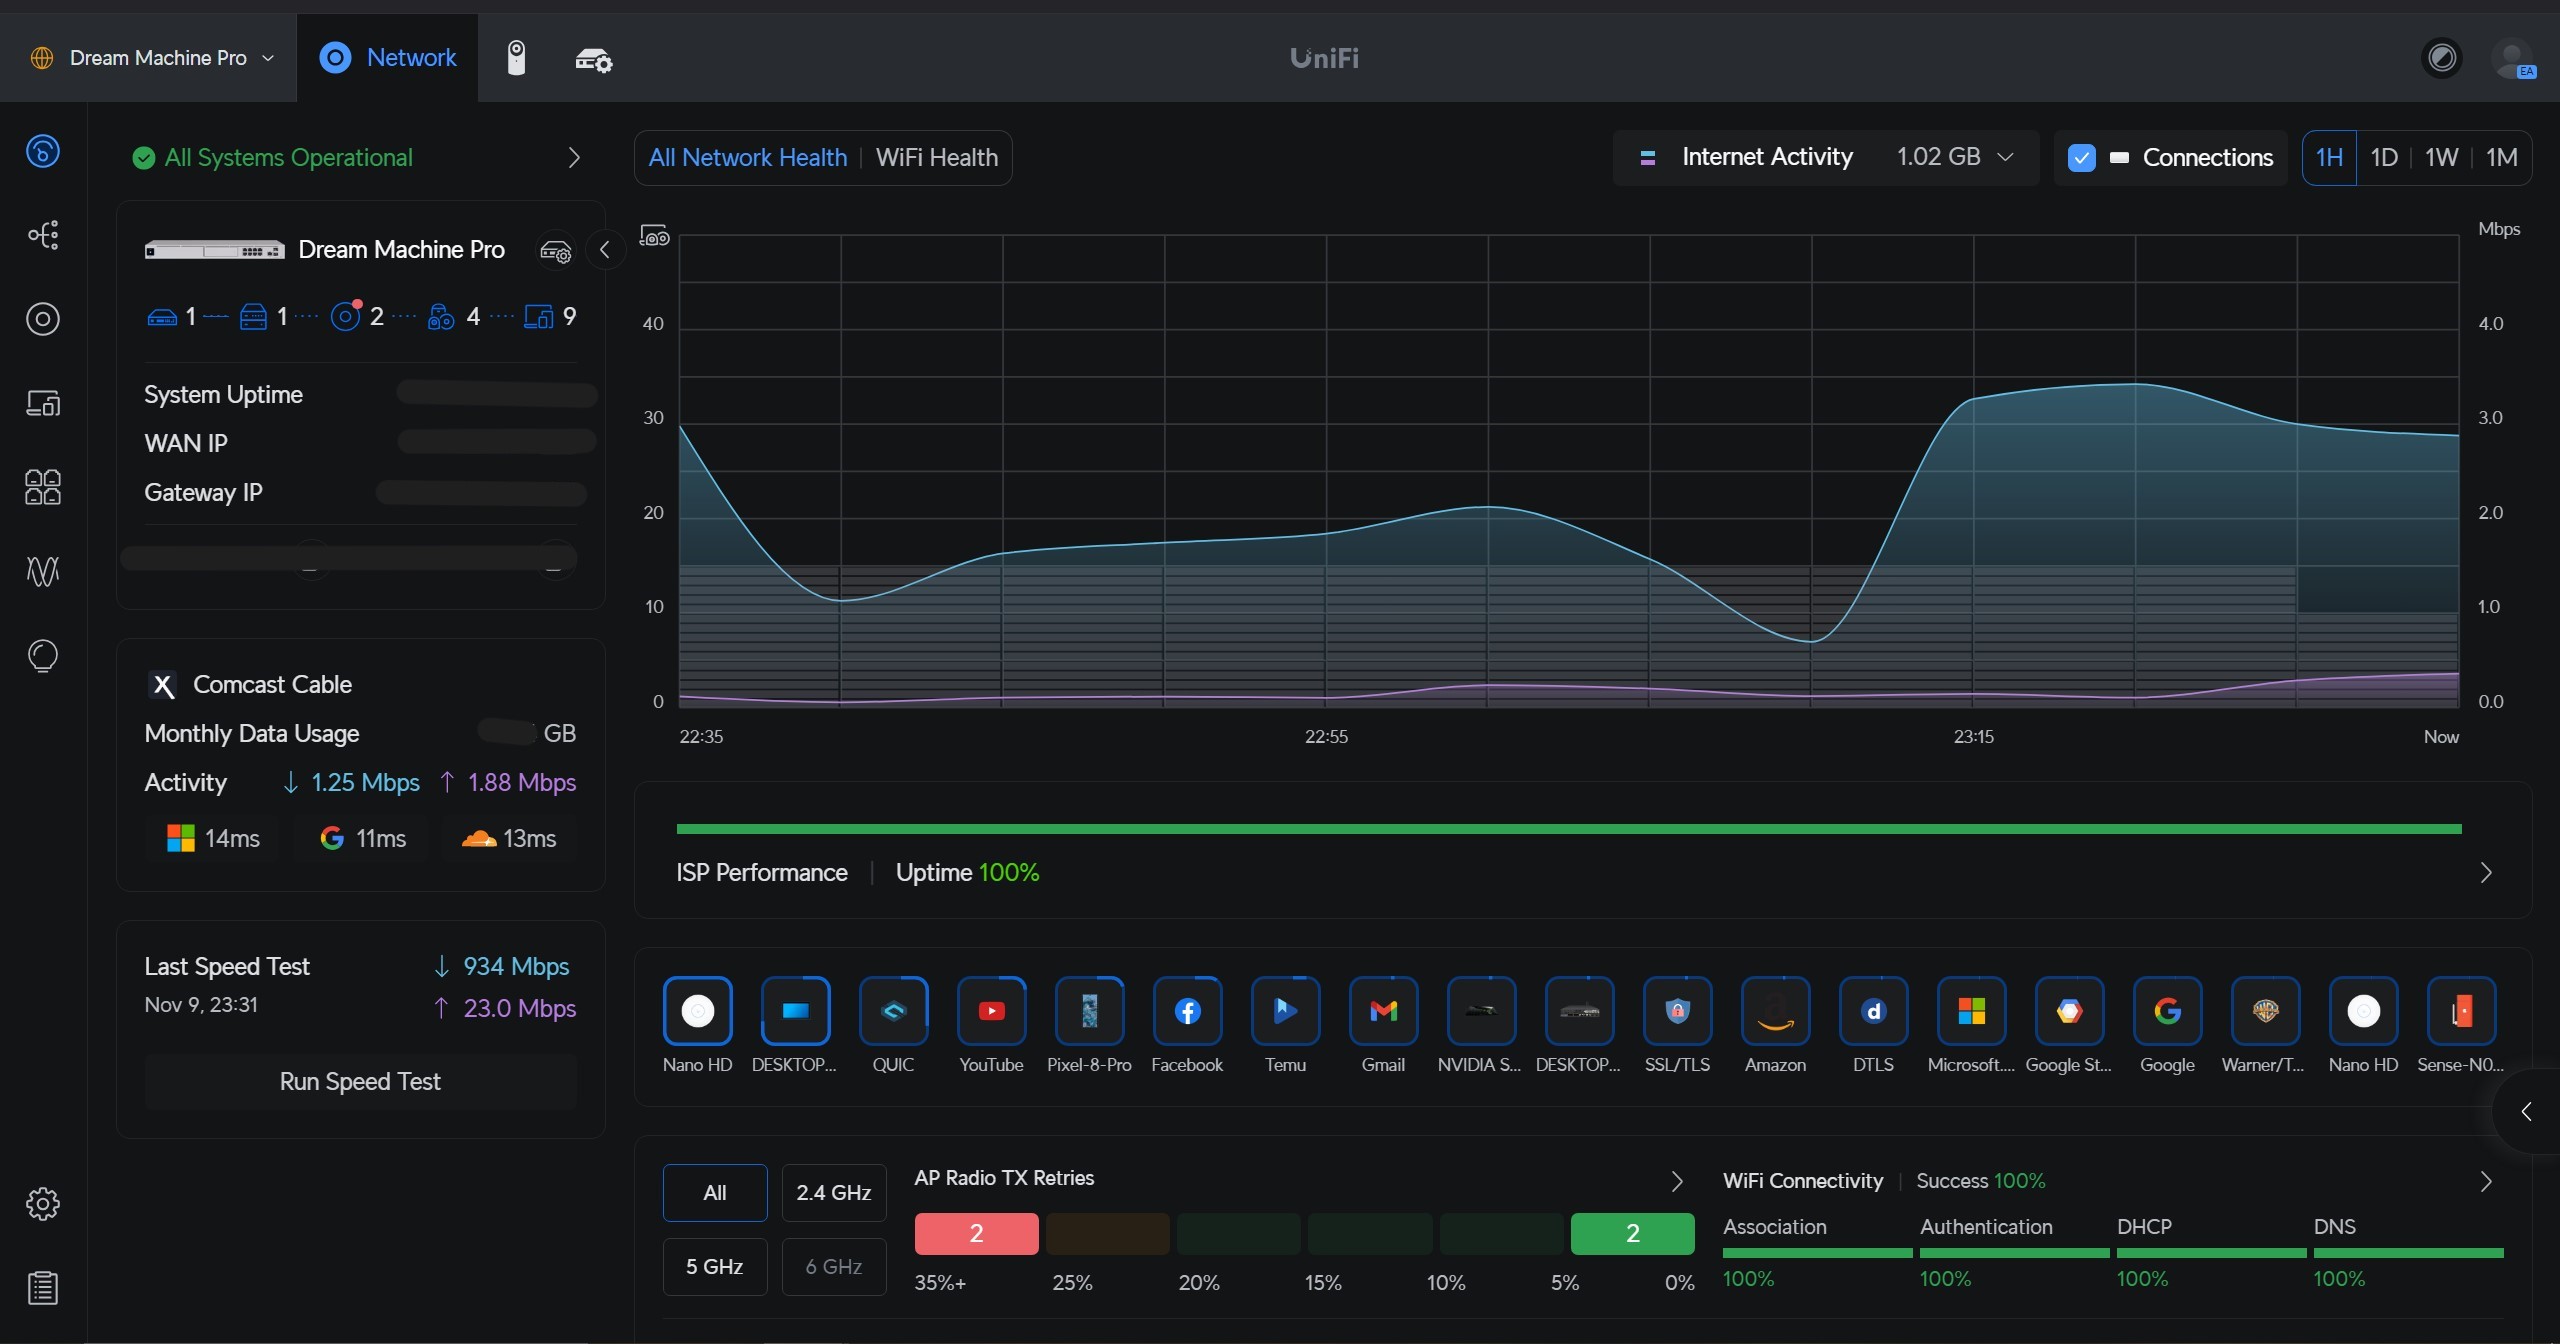
The UDM Pro is essentially an all-in-one device. One of its biggest advantages is the built-in HDD bay, which eliminates the need for a monthly subscription to access camera footage.
- 10 Gbps Local: Supports 10Gbps speeds within the local network.
- 8 Gbps Routing: Achieves up to 8Gbps for internet routing under optimal conditions without security features enabled.
- 3.5 Gbps Secured: Maintains a max of 3.5Gbps with IDS/IPS active.
- NVR Storage: Holds a 4TB drive storing footage from six cameras with a 30-day look-back period.
UniFi Switch PRO 24 PoE
I opted for the 'Pro' version despite the additional $300 to be safe rather than sorry. My network rack is in the garage, which can get hot; the Pro version includes a built-in fan for better cooling.
- 10 Gbps Backbone: High-bandwidth uplinks to the UDM Pro.
- Layer 3 Routing: Allows for traffic routing between VLANs using static routes.
- PoE Budget: Powers the entire camera and AP infrastructure.
UniFi nanoHD Access Points
A single AP wasn’t sufficient for our 2000+ sq ft house, so I purchased two for full coverage. This resolved the dead zones we previously experienced with Google WiFi during the lockdown. We still keep one old AP running exclusively for legacy 2.4GHz devices (like our printer).
UniFi Protect Cameras
I chose the G4-Bullet for outdoor use (higher quality for exterior monitoring) and the G3 Instant for basic indoor coverage. All are powered over Ethernet (PoE) straight into the Switch PRO, recording locally to the UDM Pro.
Cabling Logistics
Disclaimer: This was my first time installing cables throughout the house starting from the garage. It required some trial and error!
I drilled holes on the 1st and 2nd floors from the outside, positioning them behind old telephone cable lines on the exterior. I made sure to seal the holes with weatherproof sealant to prevent moisture or water damage.
For the outdoor-to-indoor Ethernet, I used trueCable Shielded Cat 6 Direct Burial. While potentially overkill since the cables run along the exterior wall protected by the roof, it worked in my favor during later heavy rain and wind storms. The shielded cable was particularly challenging to work with, as it’s thicker and much harder to terminate with RJ45 connectors using the T568B layout. Standard indoor Cat 6 was used for the interior drops.
Deployment & UniFi OS
After all the hardware installation, I configured the UniFi software features to secure the network, separate traffic via VLANs, and establish blocking rules.
Dashboard & Topology
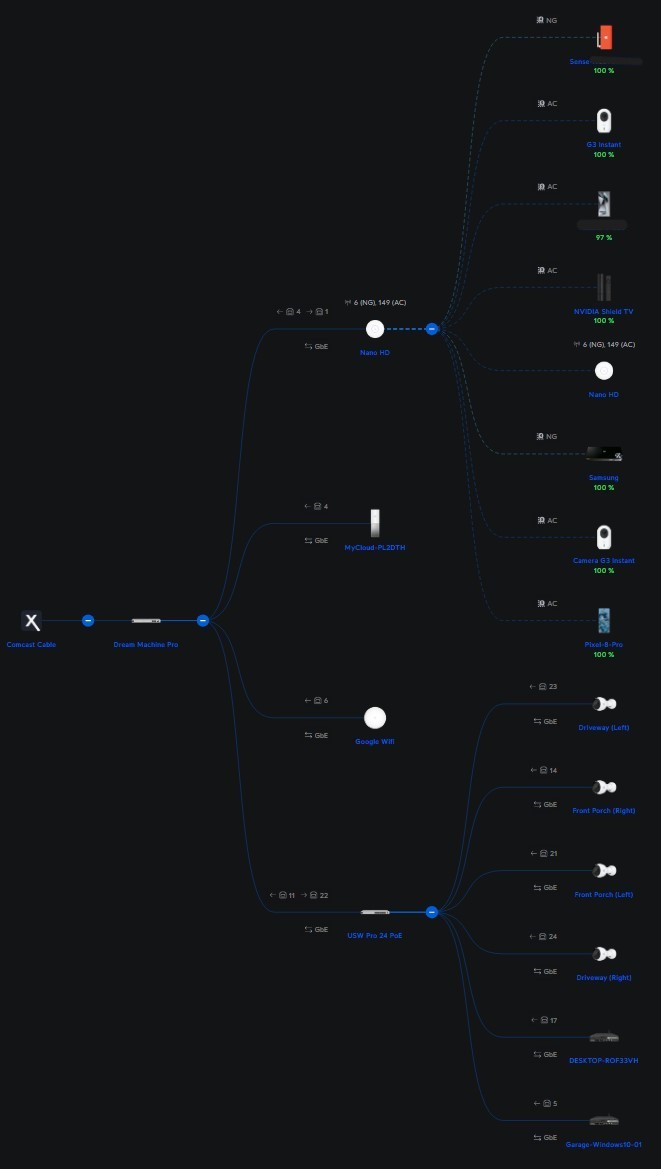
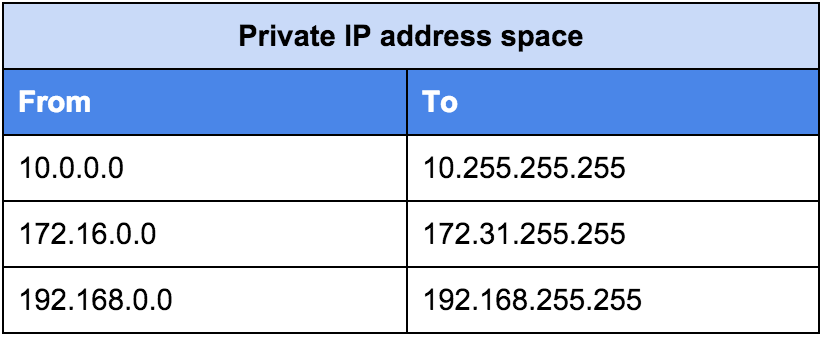
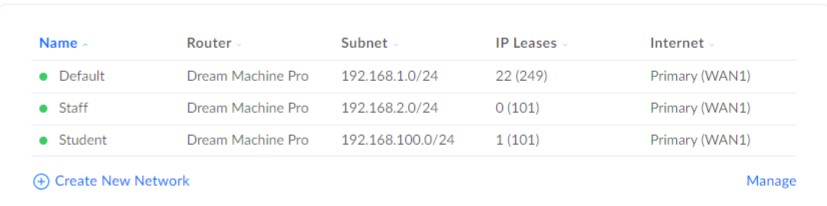
VLANs & IP Addressing
Deployment Showcase
A look at the physical deployment setup, camera feeds, and resulting network performance.
Hardware Setup
Network Speed
Camera 1

Living Room
Side Door
Project Summary
This project began in April 2021, during spring break. It took about two weeks of work, but the experience was well worth it. Of course, I didn’t do it all alone. My dad helped whenever he had free time on the weekends.
In the end, every device in our home with an Ethernet port is now connected via Ethernet cable, providing a stable 1G network speed. Our household can now support over 30 devices simultaneously without any connection issues since the network installation.
Cost Analysis
Total installation cost (purchased during 2021 global supply shortages).
Note: Initial budget was $2,000, but expanded to include outdoor cameras ($200/ea) and an extra 1000ft spool of cable due to length miscalculations.