NAS (TrueNas Scale):
A NAS (Network Attached Storage) is a storage device connected to a network, allowing multiple users and devices to access, store, and manage files in one central location, similar to a private cloud.
I needed a NAS because my storage needs were exceeding our family’s 2TB Google cloud plan, which costs $99 per year. While that may seem like a lot to some, it hasn’t been enough for our household. We constantly had to review and delete files, which was time-consuming and frustrating, especially for my parents who wanted to keep everything. Temporarily, I stored files on my computer, but that wasn’t a long-term solution. So, I began researching alternatives and discovered NAS (Network Attached Storage).
After some research, I had two options: buy a ready-to-use NAS or set it up myself. I chose to set it up myself because it’s more affordable and provides a hands-on learning experience that I’m looking forward to taking on. Based upon my research, I found TrueNAS, which offers two options: Scale and Core. Core would work perfectly if I only needed basic NAS functionality, with slightly better performance too. However, I already had additional plans for the NAS, so I opted for TrueNAS Scale. Alongside the NAS, I also set up a Plex server to stream media for our family.
Note:
This project reached its mid-point completion in July 2023 when I finished the hardware configuration. While I was overseas, I remotely accessed the system to continue with the setup and configuration. The final steps were completed when I returned in February 2024, bringing everything together.
Due to numerous connection issues during the process, I may have missed documenting some instructions, as I forgot to take screenshots while setting up my NAS and Plex server. However, as of today, the project is 100% complete, with both my TrueNAS Scale and Plex Server fully configured and operational.
Deployment:


Computer Components:
CPU: Intel i3 - 9100F $120
Motherboard: Asus Prime Z390-P $115
Ram: Corsair Vengeance LPX 8GB $25
SSD: 128 GB SSD $9
GPU: 1660 Super (Depends on Use Case) $101
HDD: Seagate EXOS X14 ST14000NM0018 14TB 256MB 7200rpm 3.5" SATA 6Gb/s Enterprise HDD (Up your needs for size TB) $130 each and bought 10
- Important: Depends on your use case. Do some research online for better explanations. Avoid SMR drives as they are cheaper per TB but have limitations.
- Seagate CMR and SMR List
PSU: CORSAIR CX-M CX750M 750 W ATX 80 PLUS BRONZE Certified Semi-Modular Power Supply $63
- Note: Chosen for future-proofing. The 750W was a great deal at the time, making it a good long-term investment.
- Newegg Power Supply Calculator (Use this for reference)
Note:
- TrueNAS Scale Hardware Guide
- Most of the components, except for the HDD and PSU, were repurposed from my GPU mining setup. I found a good deal on SSDs in bulk on eBay.
- All prices listed are based on current market rates as of July 2023.
Case: Classico PC Case ATX Mid-Tower Computer Gaming Case w/ 4 Fans GPU Vertically
- Any setup is fine; I chose this one because it offers 10 HDD slots and provides great value for its price.
OS:
- TrueNas Scale
UPS (Uninterruptible power supply): (Highly recommend)
- When choosing the capacity, it’s essential to consider the frequency of power outages in your area. Frequent outages can lead to hard shutdowns, which may severely damage your system. Investing in a reliable solution, like a UPS provides peace of mind so you can set it up and forget about it.
- Optional: Network UPS
Note:
- All these items except the HDD and PSU were all used from my gpu mining components.
- Cables: PCIE 1X SATA Card (Depending # of HDD)
Network:
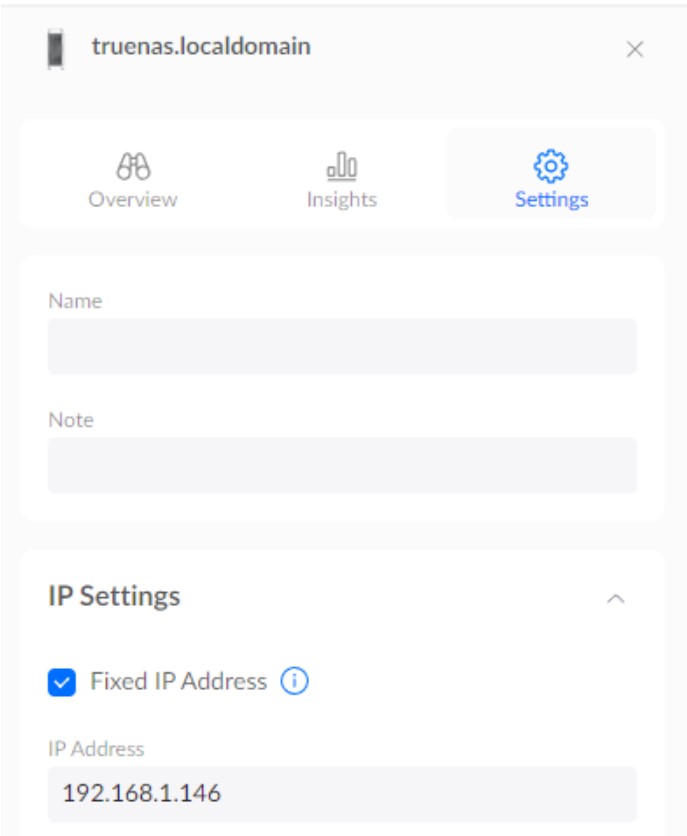
- I allocated the NAS to my network through the router’s portal and assigned it a static IP address for convenience. The screenshot is from my router settings; it may look different depending on your provider, but it should display the IP address, which matches the one used to access the TrueNAS web GUI.
Note:
- Setting up password locally will be the same when login via web
- It’s various for different people but Admin works for me and Root didn’t for the login
- After logging in go to System setting check for update to be on the latest version.
DHCP:
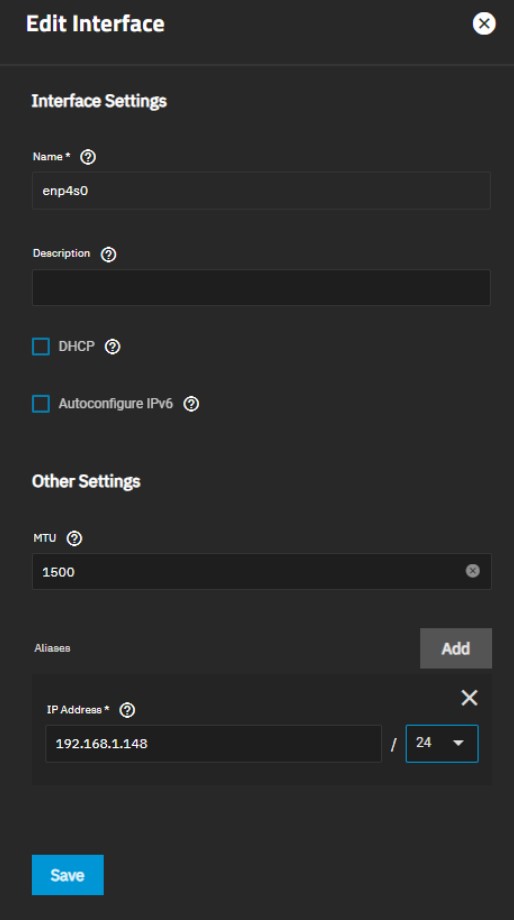
- Disable DHCP > Select an Aliases IP address that it’s unused in the network > Save
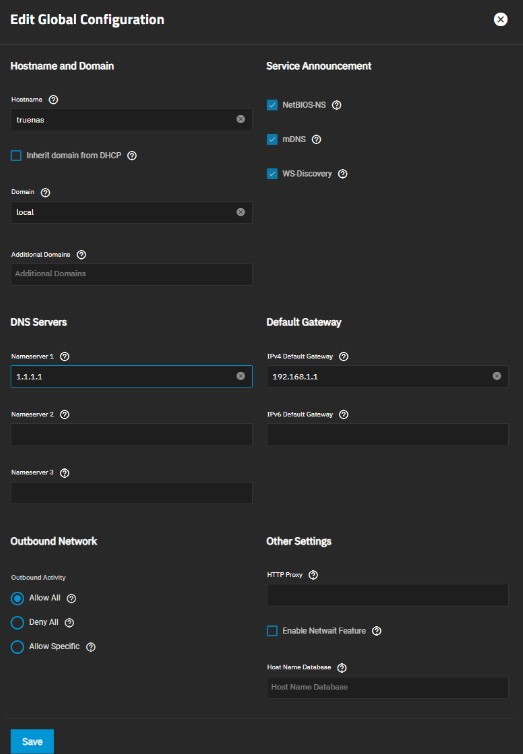
- This may come right after hitting save if not do it after it reboot the system. I added the DNS server for name server and default gateway.
- Apply
- Scroll above click test changes then open a new tab type in the new IP address from the alias
Users:
Users groups:
Left side Credentials > Local Groups > Add groups > Assign name (Home) > GID (default) > turn on samba authentication > Save
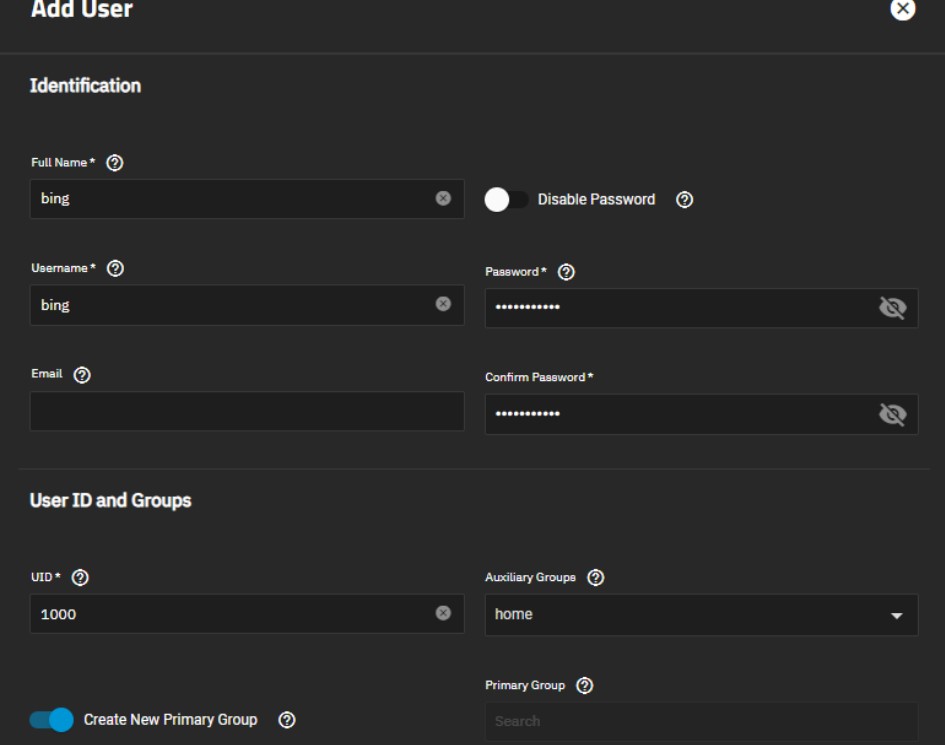
Users:
Left side Credentials > Local Users > Add info of the users > Disable create new primary group >Click below Primary group find the group just created (Home) all the way bottom > Save
Pool:
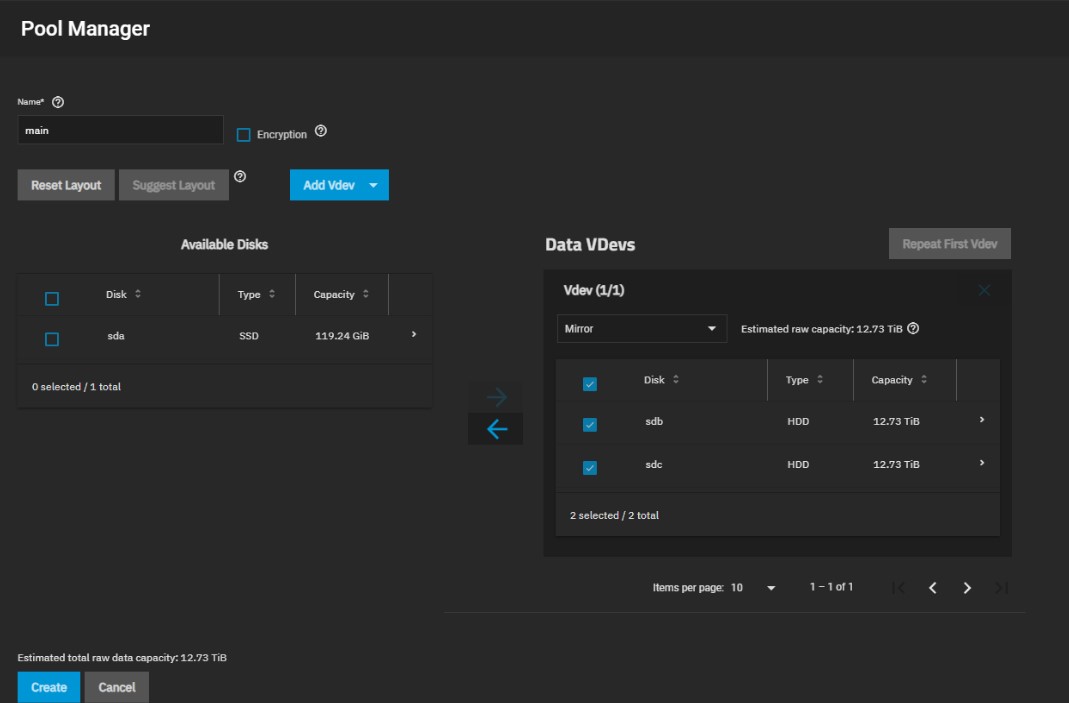
- Storage > Create Pool
- Mirror: In case one goes down it can be replace with the other HDD so in the end the space will be 12.73 tb
Inaccurate HDD capacity reporting: Inaccurate reporting
Storage Dashboard:
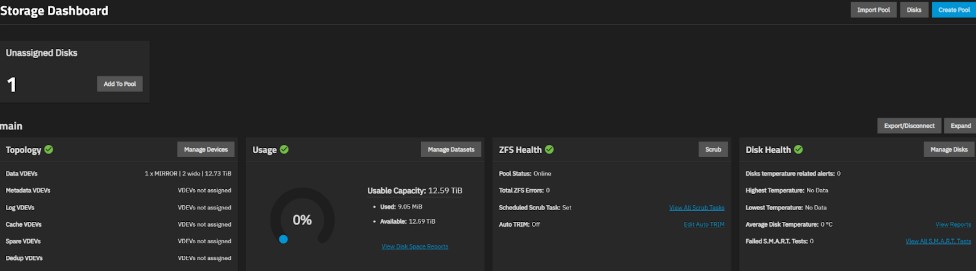
- Ignore the unassigned disk. It’s my boot drive.
Dataset:
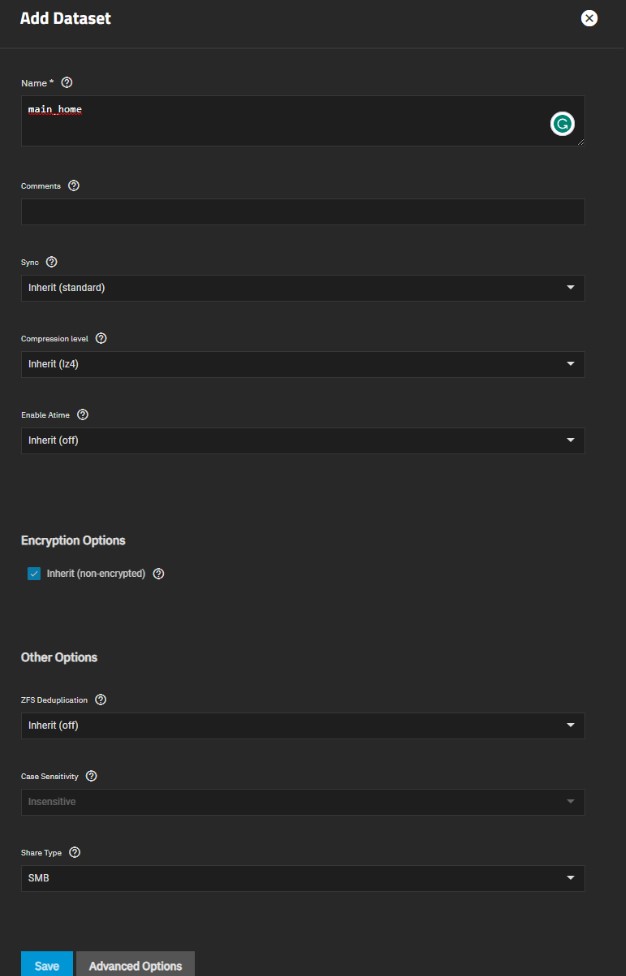
- Add dataset > Name
- Rest is default > Save
Shares:
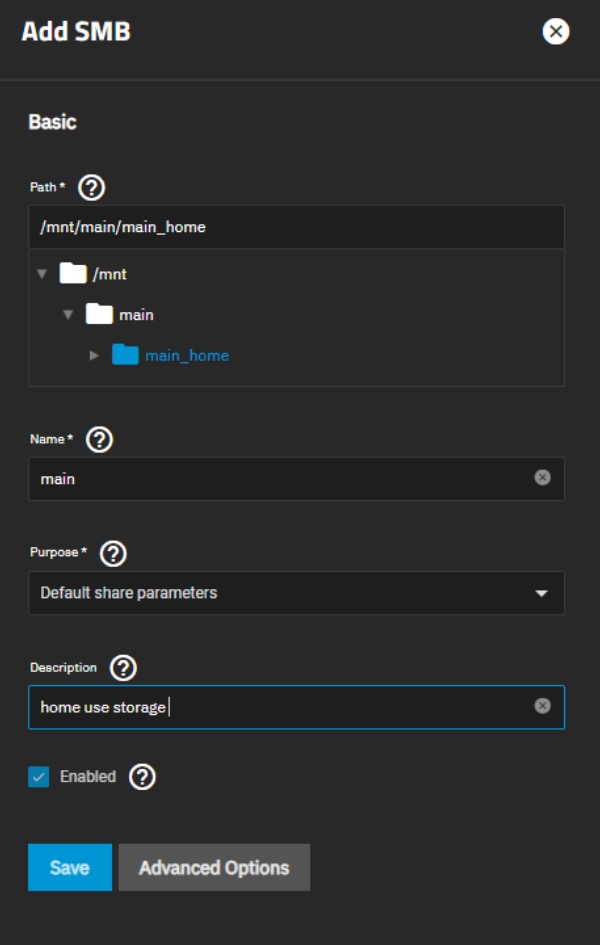
- Shares > Windows (my preference) > Add SMB > Save
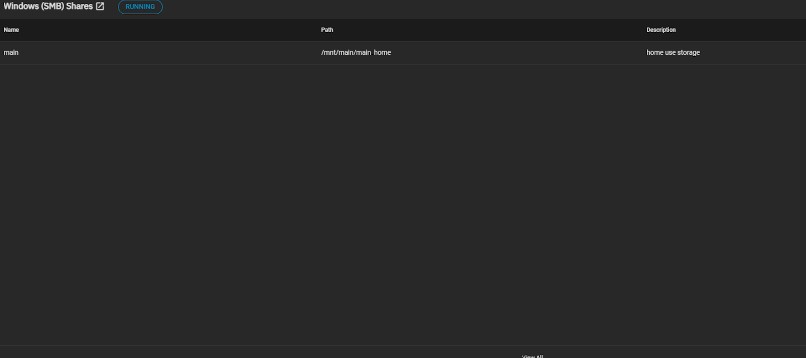
- Click view all now we have to assign users/groups for access
- Then it will prompt to SMB> Click 3 dot > Edit file system ACL
- Add Groups/Users > Save access control list
Access Control:
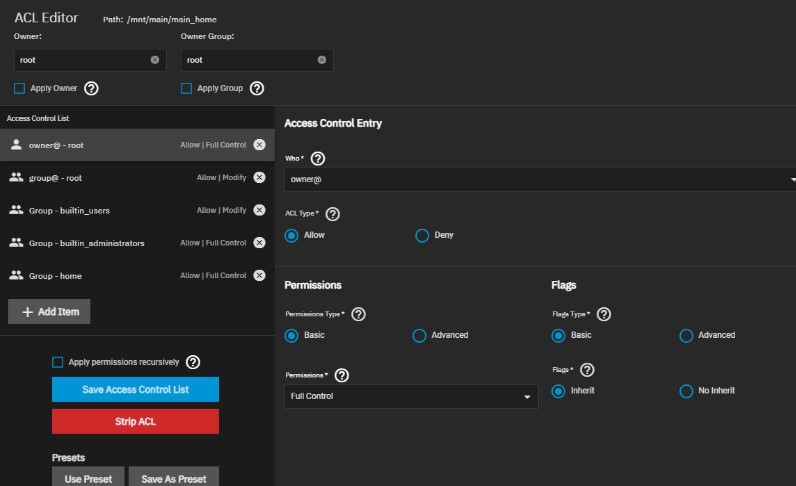
- Careful with permission more configuration under advanced.
Finding the Storage on Windows:
File explorer > This PC > Select Computer > Map network drive> Find a available drive > Folder \\192.168.1.148\main (mine) the name will be the one under the storage > Done
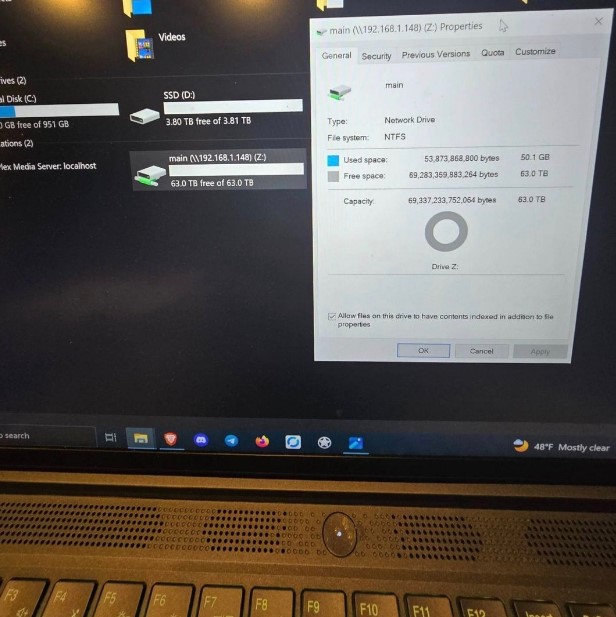
- I have ten 14TB HDDs, providing a total raw capacity of 140TB. However, I use a mirrored setup, which effectively halves the usable capacity to 70TB. In this setup, each drive acts as a backup to safeguard against potential failures. Since I’m using Windows, the reported capacity does not align with expectations because Windows uses a binary system for storage calculations, while manufacturers use a decimal system.
Data Protection:
Backup(Basic)
- Systems Setting> Manage configuration> Download file
- Small file doesn’t hurt when making changes this is just in case
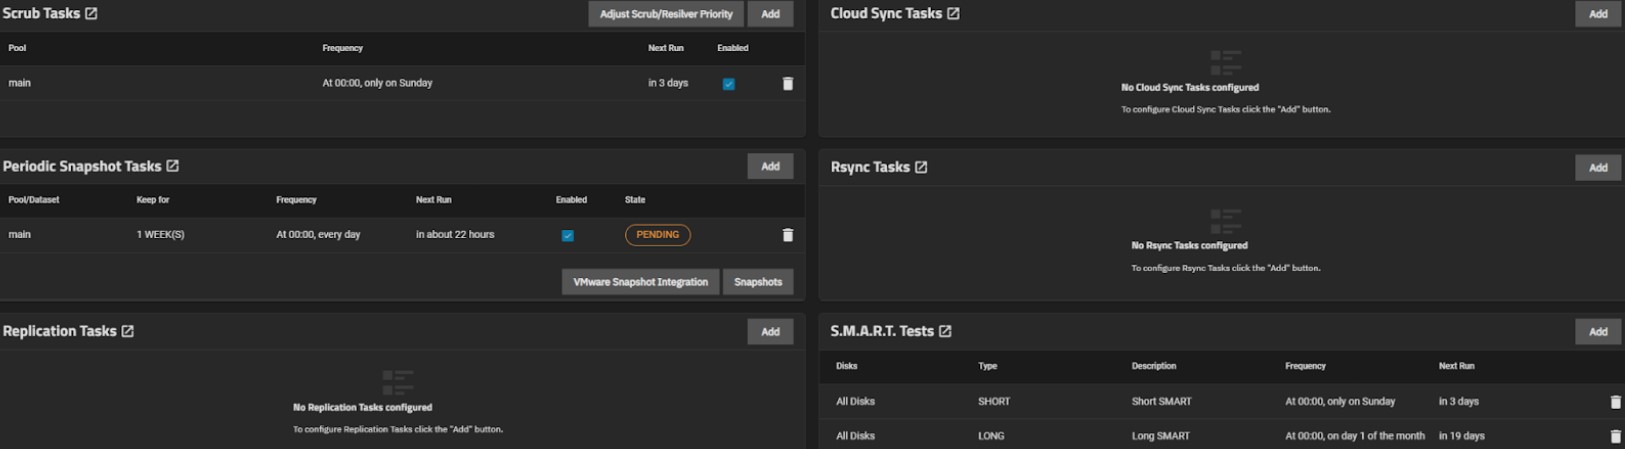
SMART: (Personal preference)
- Short: Ideally weekly
- Long: Monthly
Scrub Tasks:
- This should be already on just go with default
- Monthly should be okay but I went with weekly
Snapshots (Important):

- Backup(Advanced)
- This is optional depending on your needs
Optional: UPS (Uninterruptible power supply):
The UPS must be NUT compatible. NUT UPS
- To navigate first > Systems Setting > Services > Configure
Plex (Media Server):
Computer components:
- Integrated into the NAS together
- Check requirements
- Signed up for account
- Get the code from https://www.plex.tv/claim/
- Dataset > Add Dataset > Name > Save

Install the plex app in the Apps page
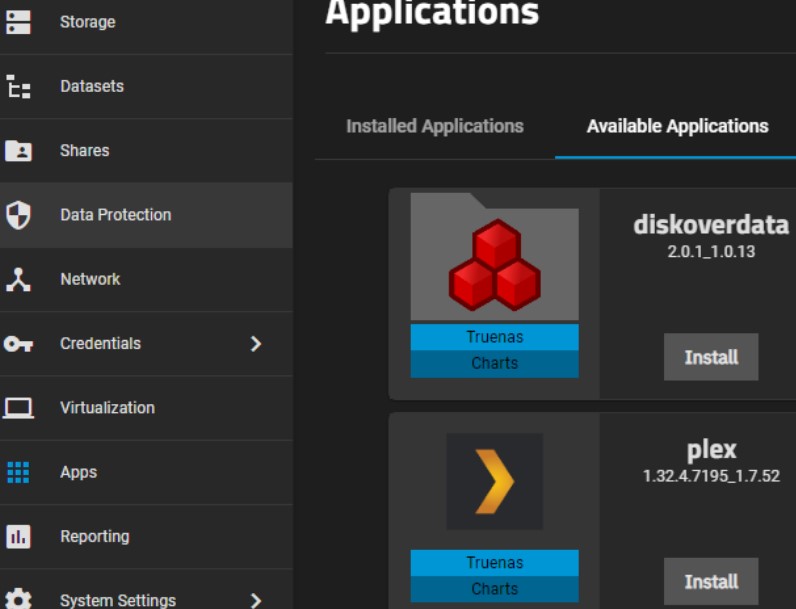
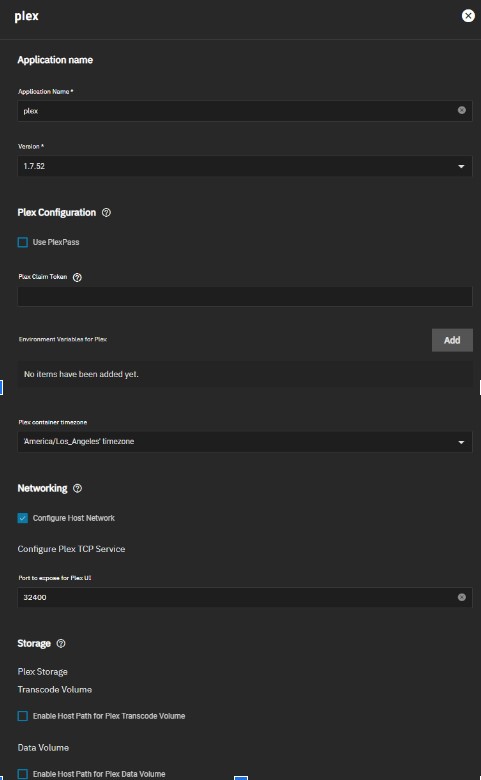
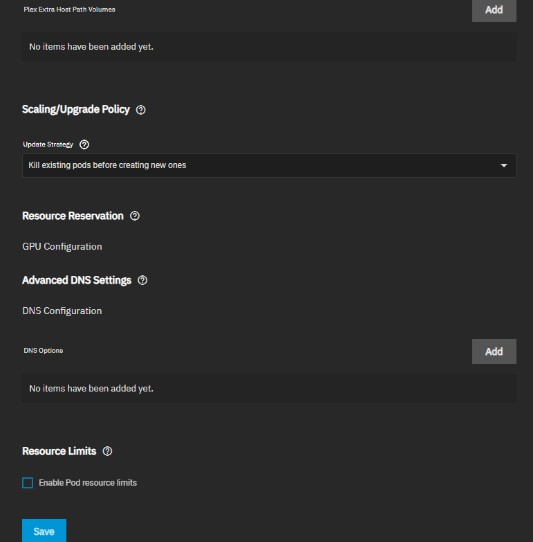
- Add GPU if you have one for encoding
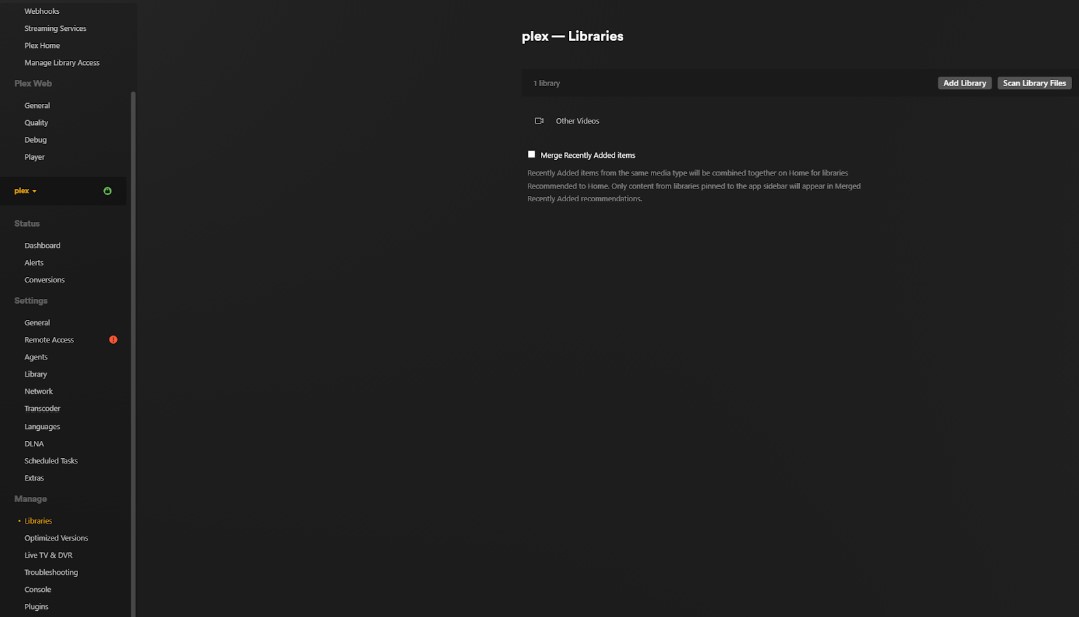
After installation go to installed applications > web portal
Server Setup:
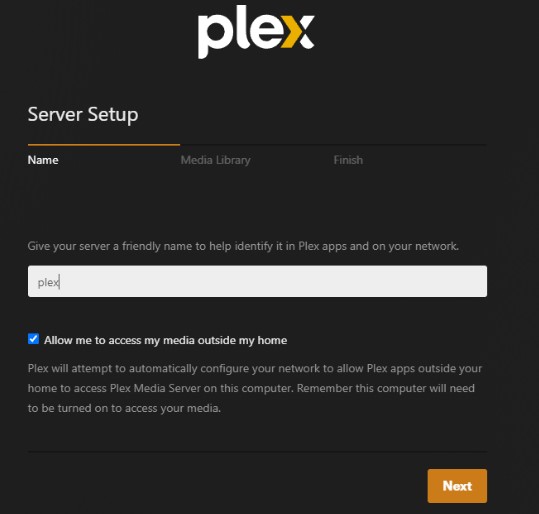
After you select videos and add them into the folder and that’s it
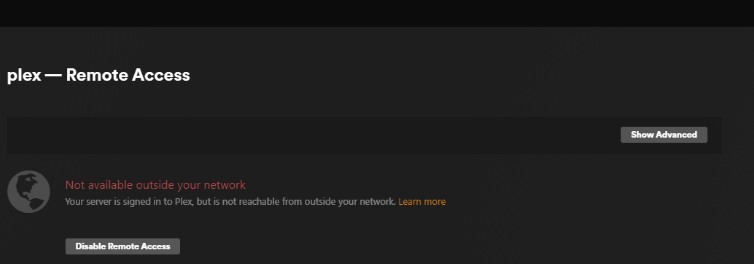
Remote access:
This is how you share people you want to grant access to your plex server
- Click top wrench/tool
- Read this it’s straightforward for details for configuration
- Setup a static IP for convenience and it’s done through Modem portal and in the plex portal
For my case:
- I did it in Unfi settings > firewall & security > port forwarding > configure > save
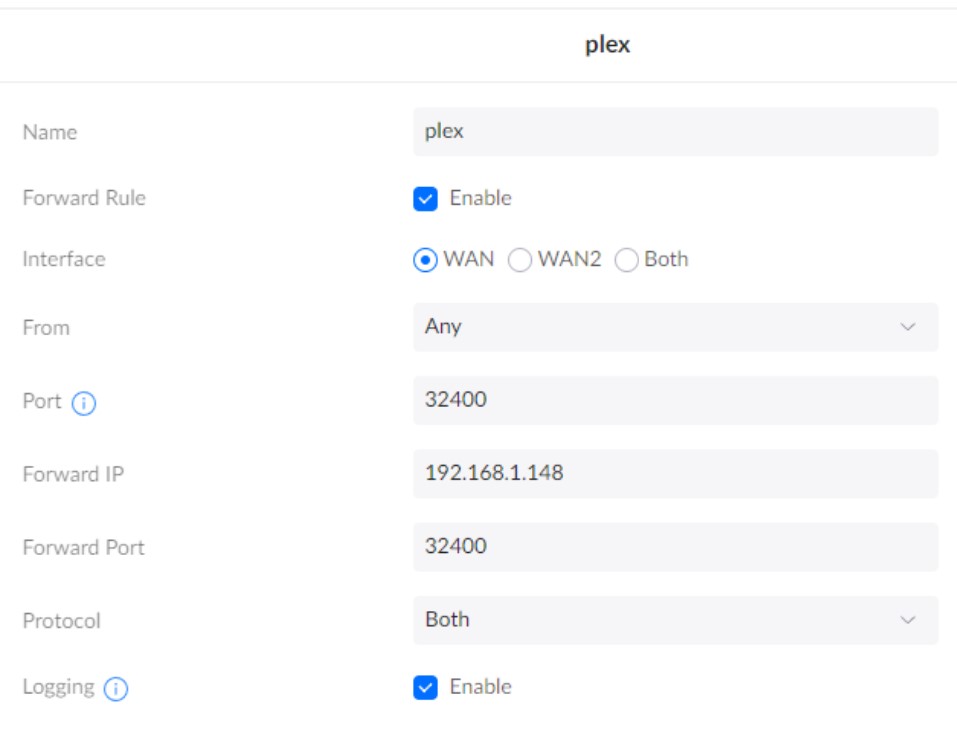
- Setup dedicated IP
- This should be the last step unless there’s NAT issue or from ISP
- Plex Troubleshooting
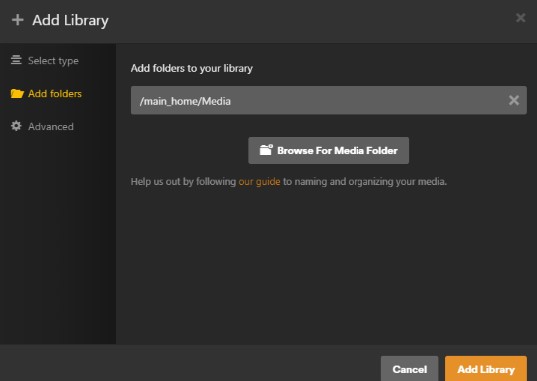
Add Library and Upload:
- Various media type Movies, Tv shows, music, photos, etc
- Must upload the file otherwise will not be able to create a library.
Summary:
The total cost for this build was $1,800, providing 70TB of storage space. Based on our current Google storage subscription of 2TB for $99 per year, the roi 18 months. For many people, this project might seem too expensive or offer more storage than necessary and I can understand that perspective. However, aside from the HDDs and computer case, I repurposed components we already had at home, saving around $500 in theory.
I opted for a large build because my parents like taking photos and recording videos, which consume a lot of space. Additionally, I use the NAS to store movies on my Plex server, making them easily accessible for streaming anywhere in the house.