Home Network:
During the pandemic, I decided to phase out my traditional home network due to frequent connectivity issues around the house and the recurring modem/router rental fees. I upgraded to a more advanced, mini-enterprise-style setup to ensure a reliable, future-proof network for at least the next 10 years.
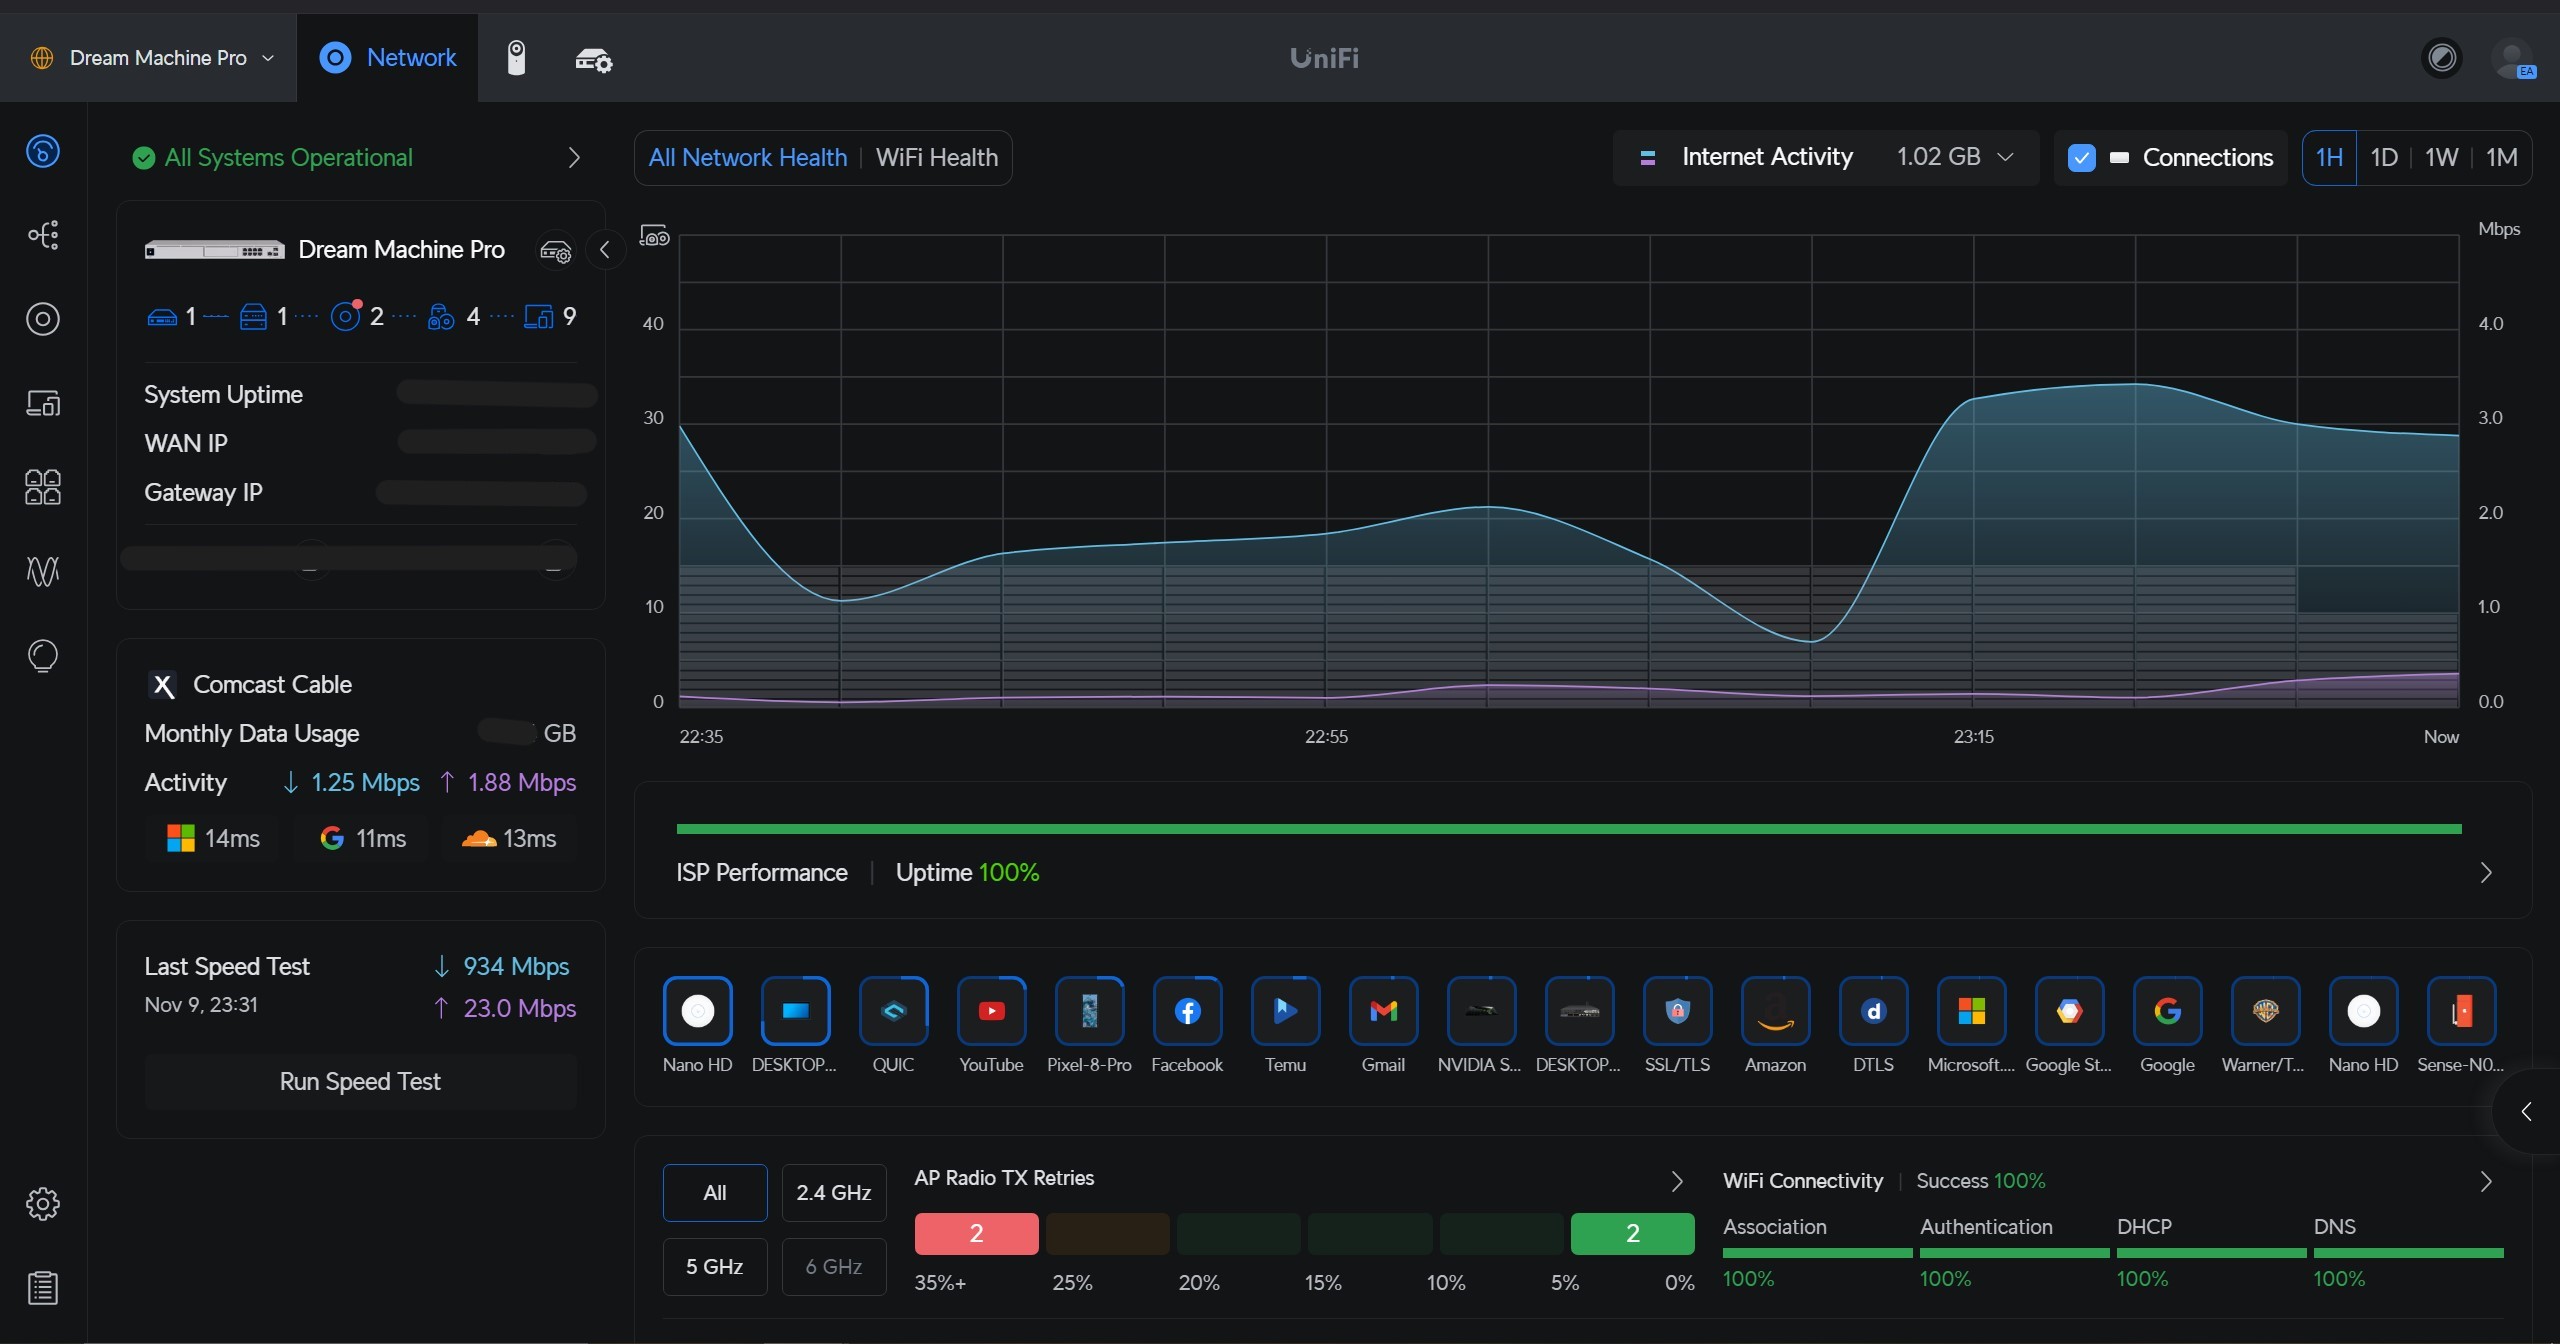
Our ISP, Comcast, provides a download speed of 1 Gbps and an upload speed of 40 Mbps. Unfortunately, this is the best package available in our area.
Equipments:
- NETGEAR Nighthawk Multi-Gig Cable Modem CM2000 (2.5Gbps)
- UniFi Dream Machine Pro
- UniFi Switch PRO 24 PoE
- UniFi nanoHD Access Point
- UniFi Protect G4-Bullet Camera (Outdoor)
- G3 Instant (Indoor)
- trueCable Cat 6 CMR Riser Unshielded 1000ft (Indoor)
- trueCable Shielded Cat 6 Direct Burial 1000ft (Outdoor)
Tools:
- RJ45 connectors and shielded external ground connector
- Keystone jack wall plate
- Keystone jack
- Wall mount patch panel 8U
- 1U PDU
- Klein Tools VDV427-300 Impact Punchdown Tool
- Drywall Saw
- Klein Tools VDV226-110 Ratcheting Modular Data Cable Crimper / Wire Stripper / Wire Cutter for RJ11/RJ12 Standard, RJ45 Pass-Thru Connectors
- Optional: Cable management
Setup:

Unifi Dream Machine Pro:
- 10 Gbps for Local Network Connections: Supports 10 Gbps speeds within the local network.
- 8 Gbps Routing Throughput: Achieves up to 8 Gbps for internet routing under optimal conditions and without security features enabled.
- 3.5 Gbps with Security Features Enabled: Maintains a maximum of 3.5 Gbps with IDS/IPS security features active.
- NVR HDD Bay for Security Camera Storage: Includes an HDD bay for network video recording (NVR), allowing direct storage of camera footage.
The UniFi Dream Machine Pro is essentially an all-in-one device. One of its biggest advantages is the built-in HDD bay, which eliminates the need for a monthly subscription to access camera footage. The amount of storage depends on the HDD size you choose; I opted for a 4TB (or possibly an 8TB) drive. This capacity is more than enough to meet our household needs, allowing us to store footage from six cameras with a 30-day look-back period.
Switch:
I chose the UniFi Switch PRO 24 POE, opting for the 'Pro' version despite the additional $300, to be safe rather than sorry later on. My network rack is located in the garage, which can get quite hot in the summer due to limited airflow. The Pro version includes a built-in fan for better cooling. Additionally, it offers a 10 Gbps backbone and, importantly, Layer 3 functionality, allowing for traffic routing between VLANs and other destinations using static routes. Layer 3 routing can also be implemented alongside a UniFi Gateway.
Access Point:
I chose the UniFi nanoHD AP for our house. A single 802.11ac access point isn’t sufficient, so I purchased two for full coverage. Previously, we used Google WiFi (before the Nest WiFi Pro was available). While Google WiFi helped to some extent before the pandemic, it struggled during lockdown when more of us were using devices at the same time. Our house is over 2000 square feet, but Google WiFi only covers around 1500 square feet, which leaves some areas with limited connectivity. Currently, we still use an AP to support older devices that only work with 2.4 GHz, like our printer that performs better with Google Wifi rather than UniFi’s nanoHD AP.
Cameras:
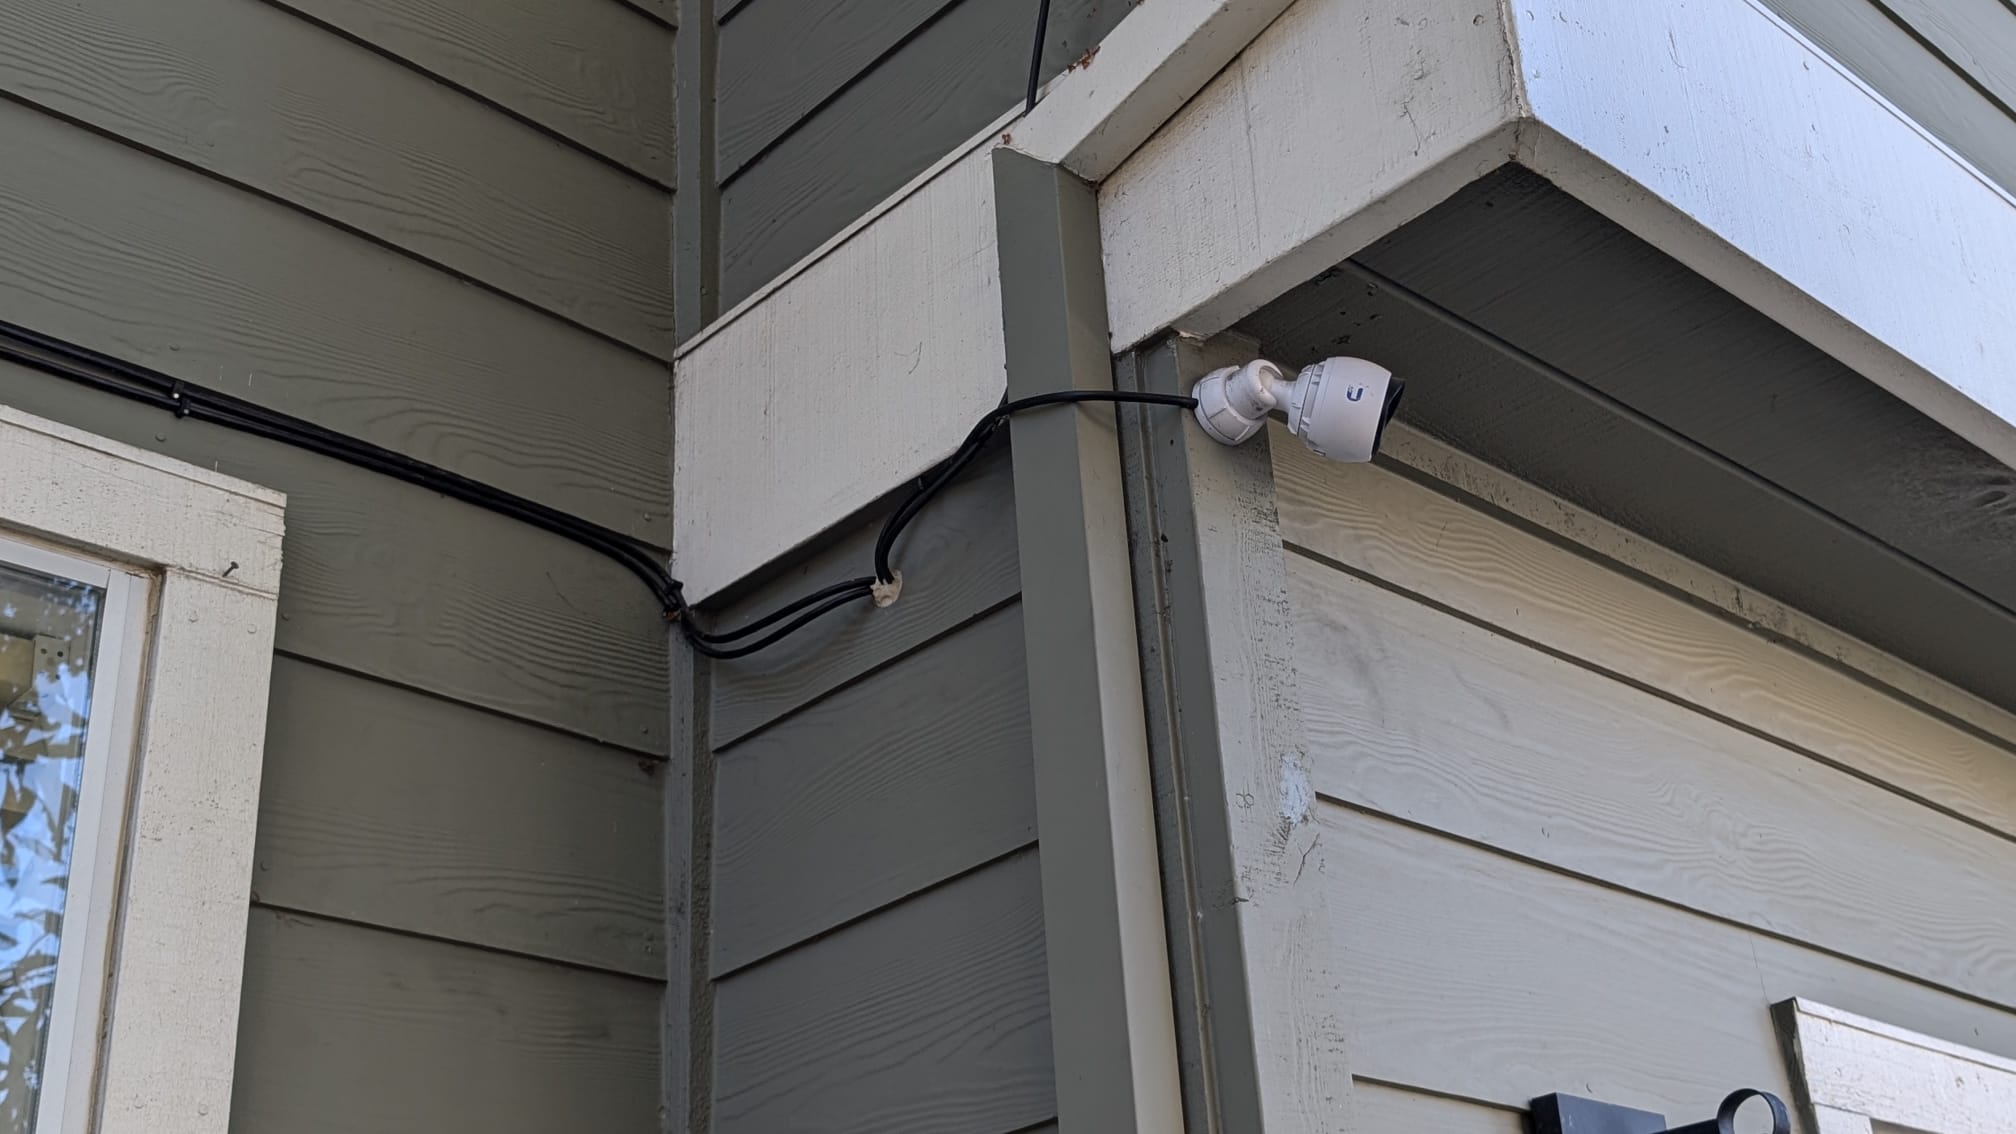
I chose the UniFi Protect G4-Bullet Camera for outdoor use and the G3 Instant for indoor use, selecting these options as budget-friendly and suitable for my needs. The outdoor cameras are higher quality for better performance, while the indoor cameras provide a basic solution for monitoring indoor spaces. All cameras are powered over Ethernet (PoE) and connected to my Dream Machine Pro.
Ethernet Cable:
Quick Disclaimer This is just a description of what I did. I’m not sure if it's the best practice, so it's always better to do some research or consult a professional.
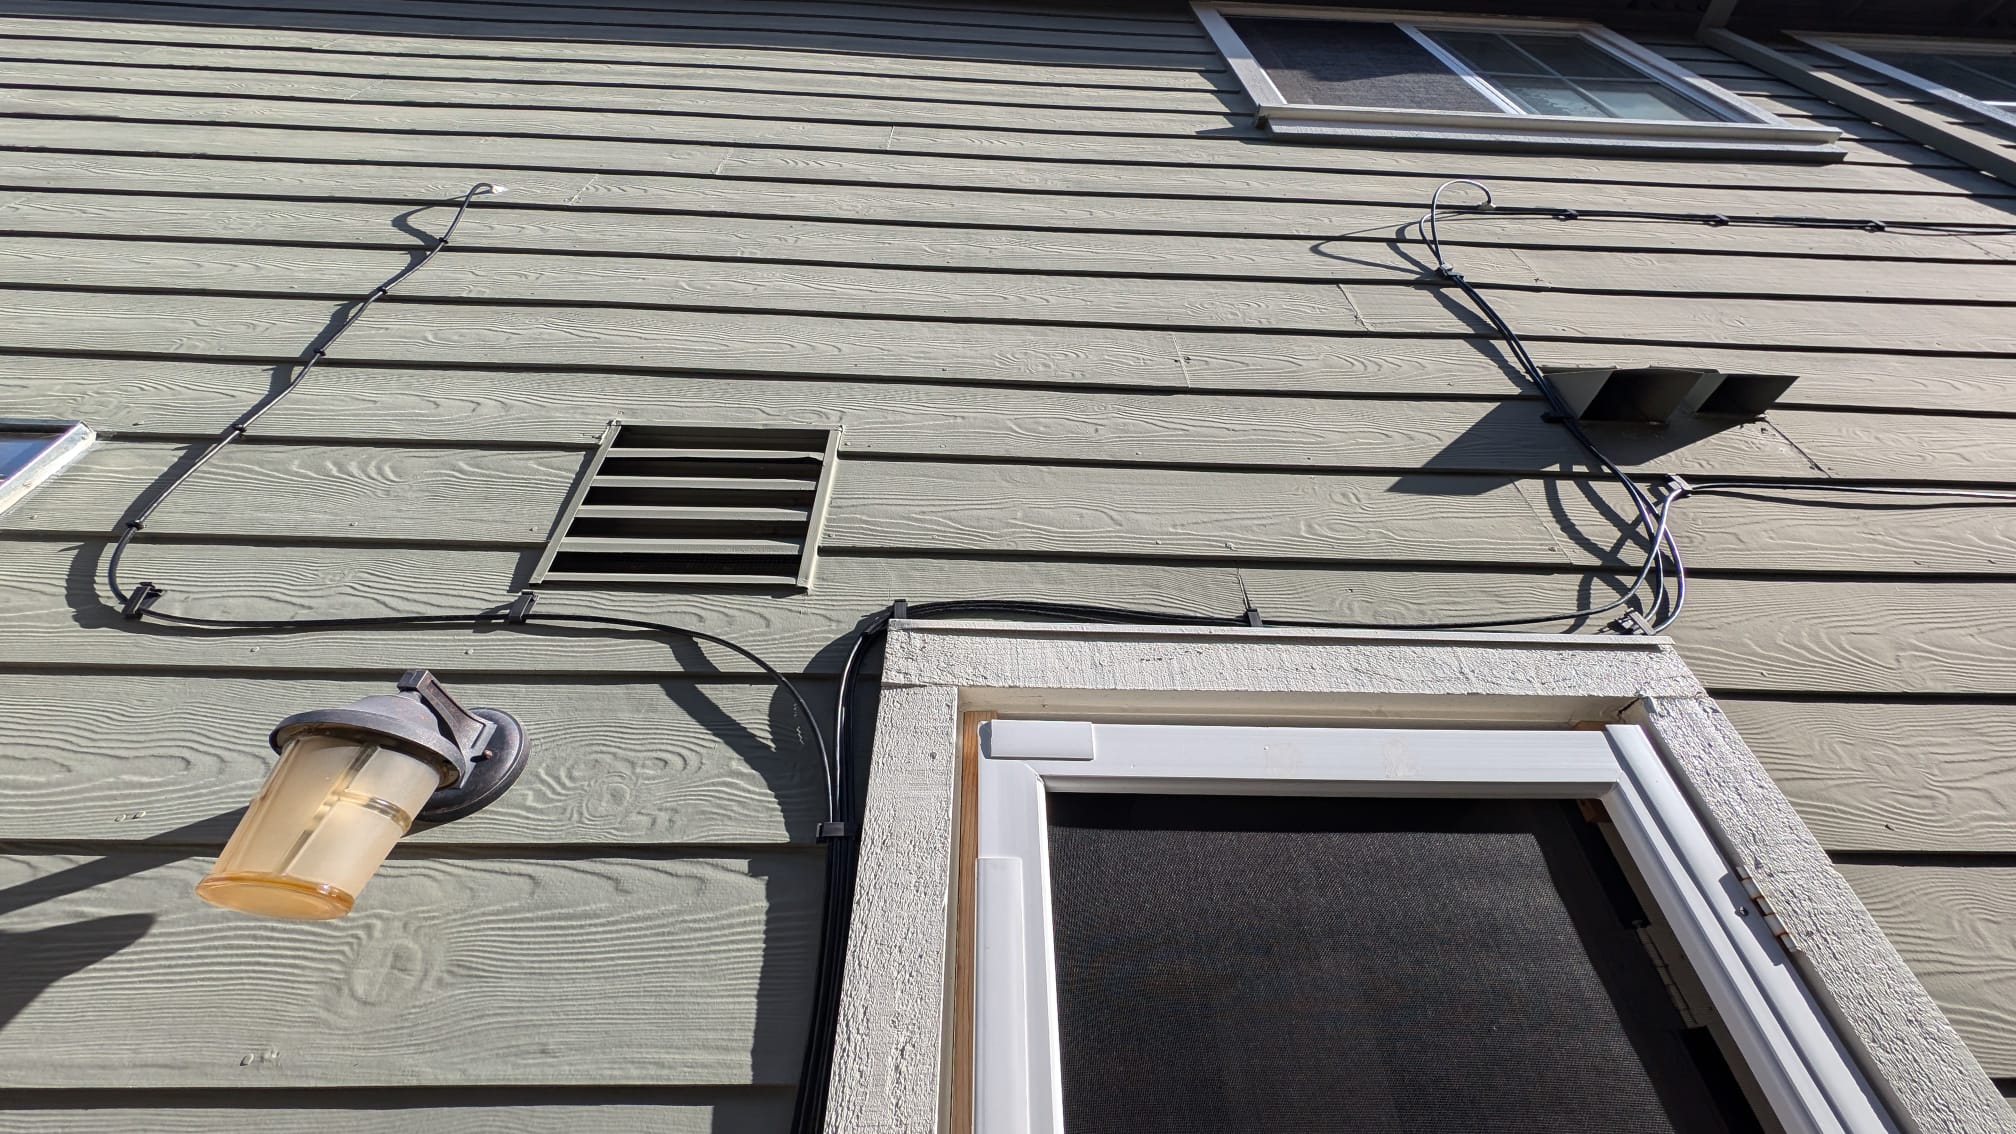
This was my first time installing cables throughout the house, starting from the garage. I drilled holes on the 1st and 2nd floors from outside of the house, positioning them behind old telephone cable lines on the exterior. I made sure to seal the holes to prevent moisture, mold, or water damage. I don’t recall the exact name of the sealant, but it’s weatherproof and helps protect against any potential issues.
For the outdoor-to-indoor Ethernet connection, I used "trueCable Shielded Cat 6 Direct Burial" cable. This choice might be overkill for my location, where rain is rare, and when it does rain, wind isn’t typically a major factor into consideration. Plus, the cable runs along on the house's exterior wall, protected by the roof. However, this worked in my favor in the long run, as we've since had heavier rain and wind that reached the cables. I’m not sure what risks are involved with using regular Ethernet cable outdoors, but I didn’t want to risk damaging the equipment by using non-shielded cable just to save on costs and time.
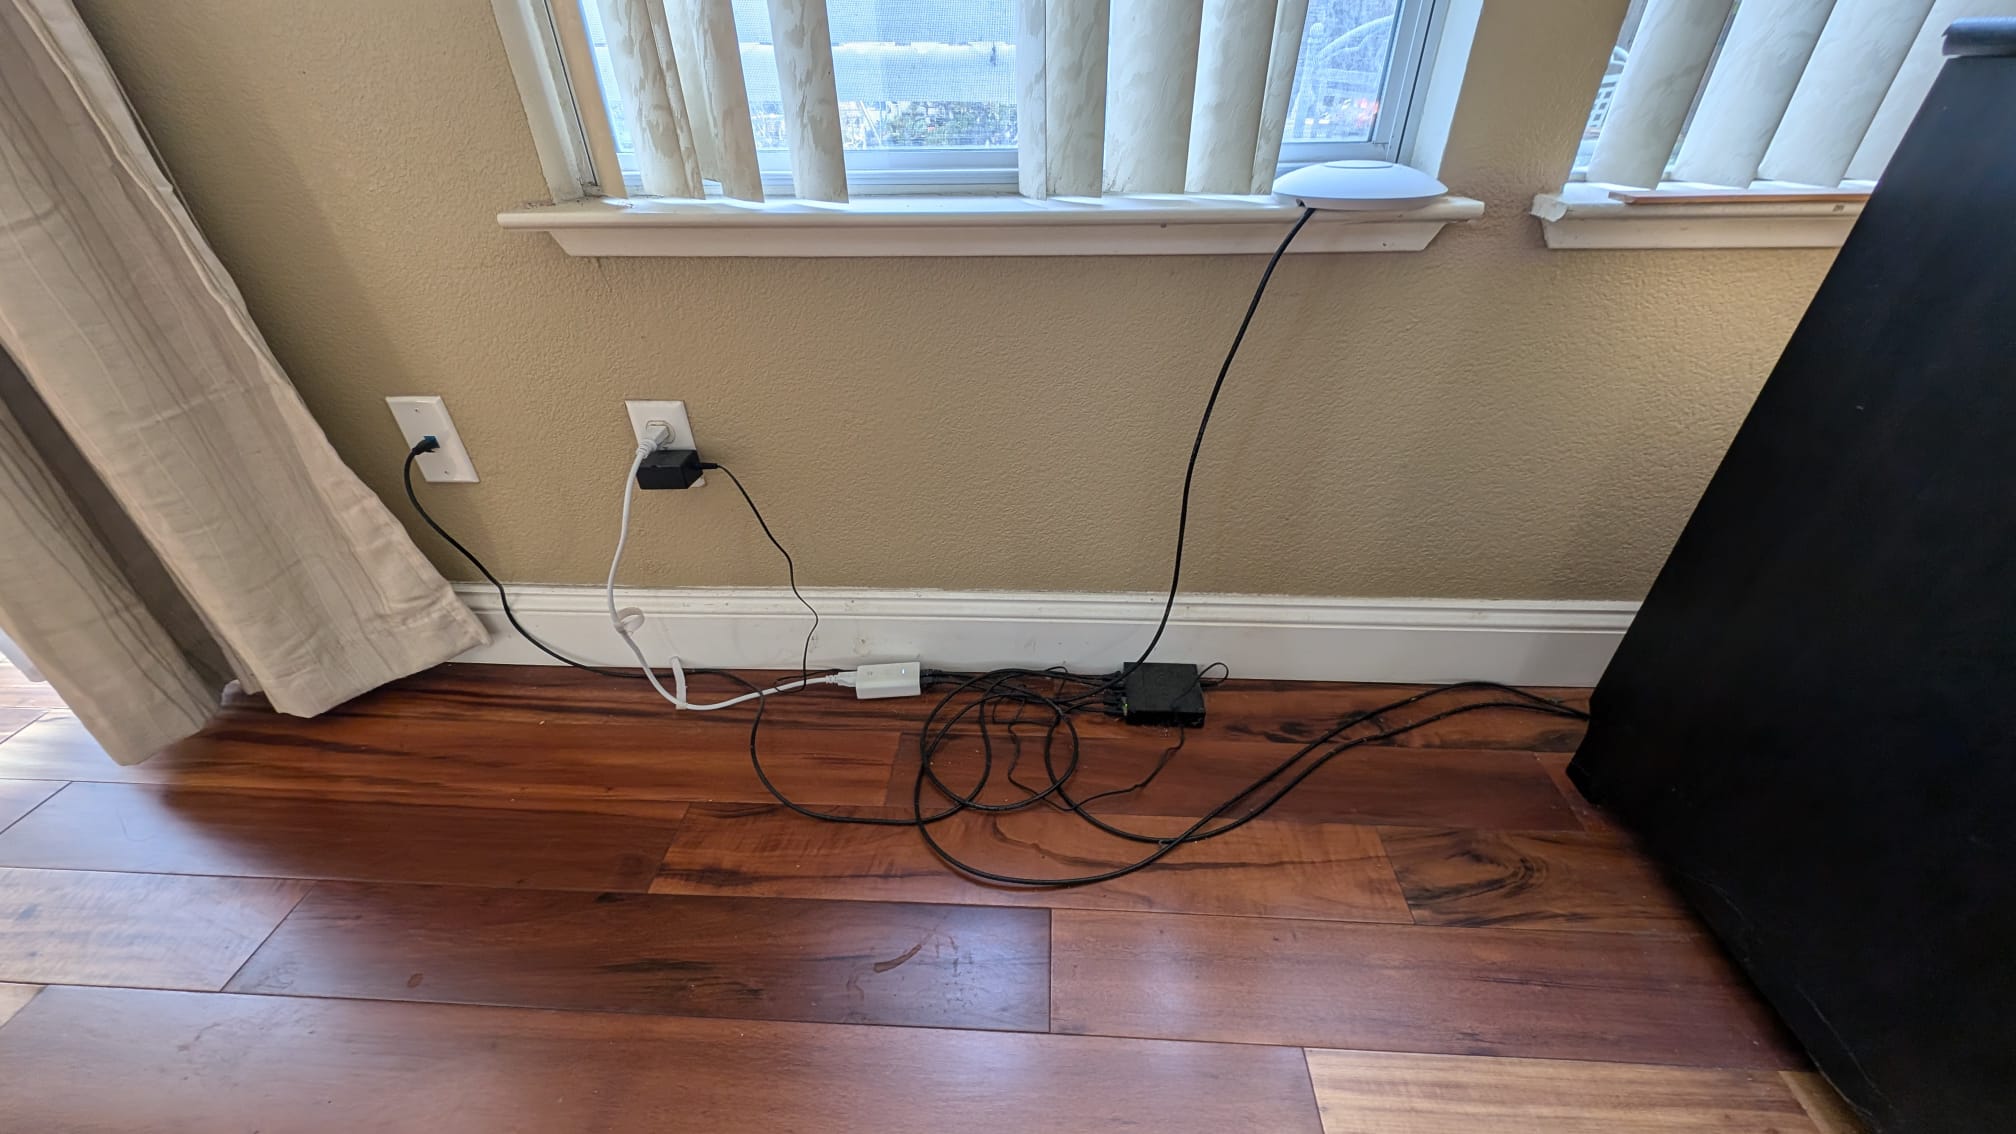
As for inside the house, just use standard ethernet cable.
For most households, I think 500 feet of cable should be sufficient, though I had some trial and error with measurements and cable terminations. The shielded cable was particularly challenging to work with, as it’s thicker and more difficult to terminate with RJ45 connectors using the T568B layout
After all the hardware installation I decided to play around with unifi software along the features provided from unifi. Below with pics showing the UI of unifi network.
Deployment:
Cost:
The total cost for the entire installation was about $4,000. Initially, the budget was around $2,000, and we hadn’t planned to include outdoor cameras, as they were $200 each and we needed at least four for full coverage of the house. When we made the purchases in 2021, it was probably not the best time due to global supply shortages and high demand, which likely drove up prices. Additionally, I miscalculated the cable length, resulting in a shortage and requiring an extra roll that cost another $150.
Dashboard:
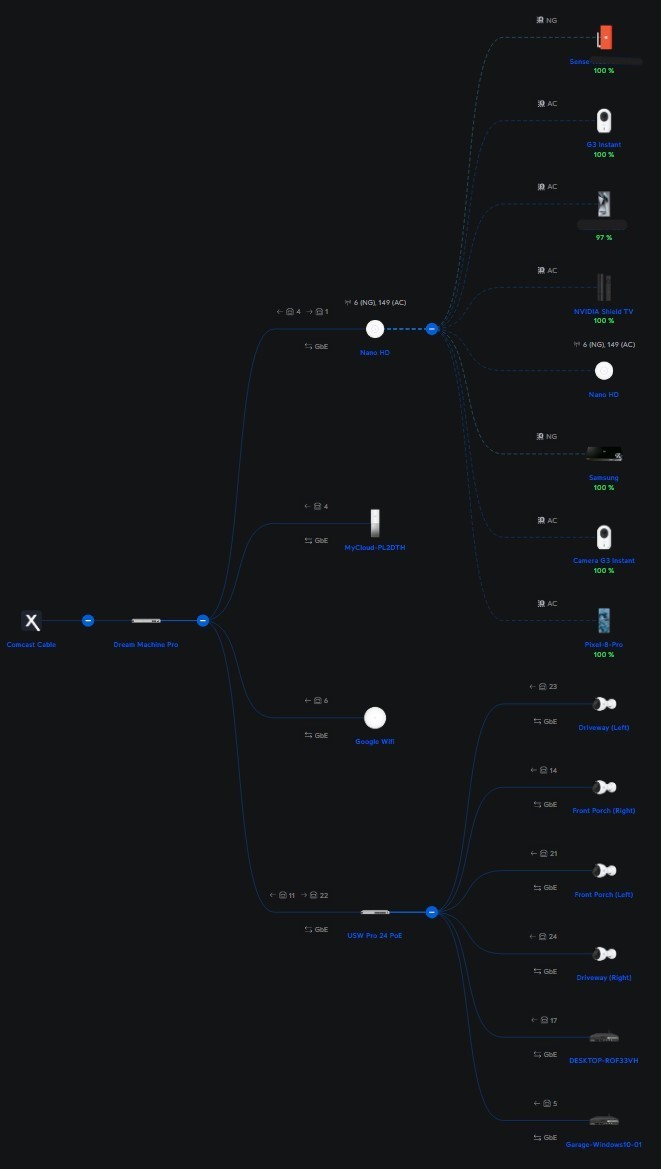
Network Topology:
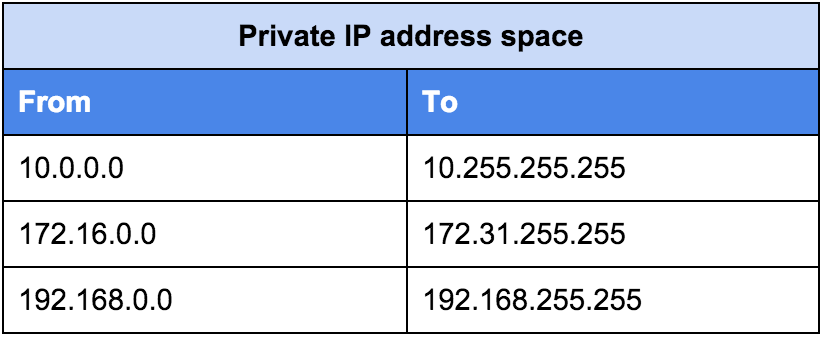
Private Address:
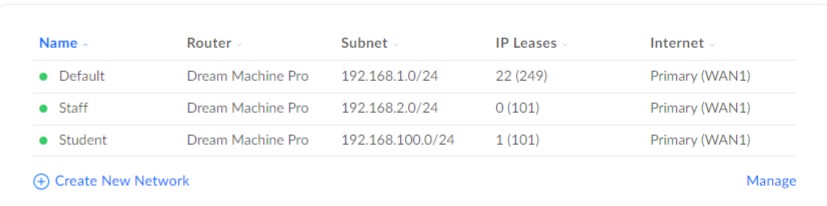
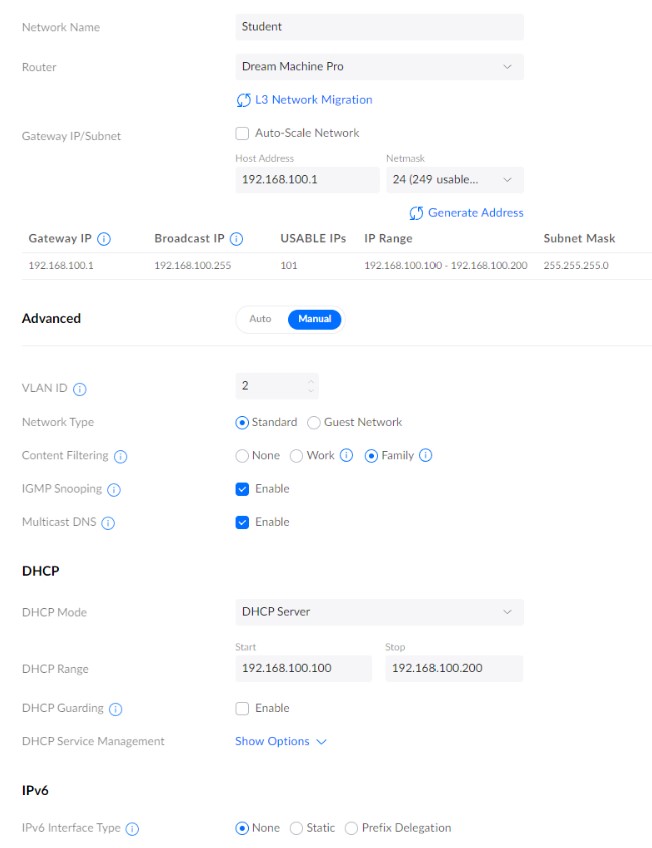
Networks:
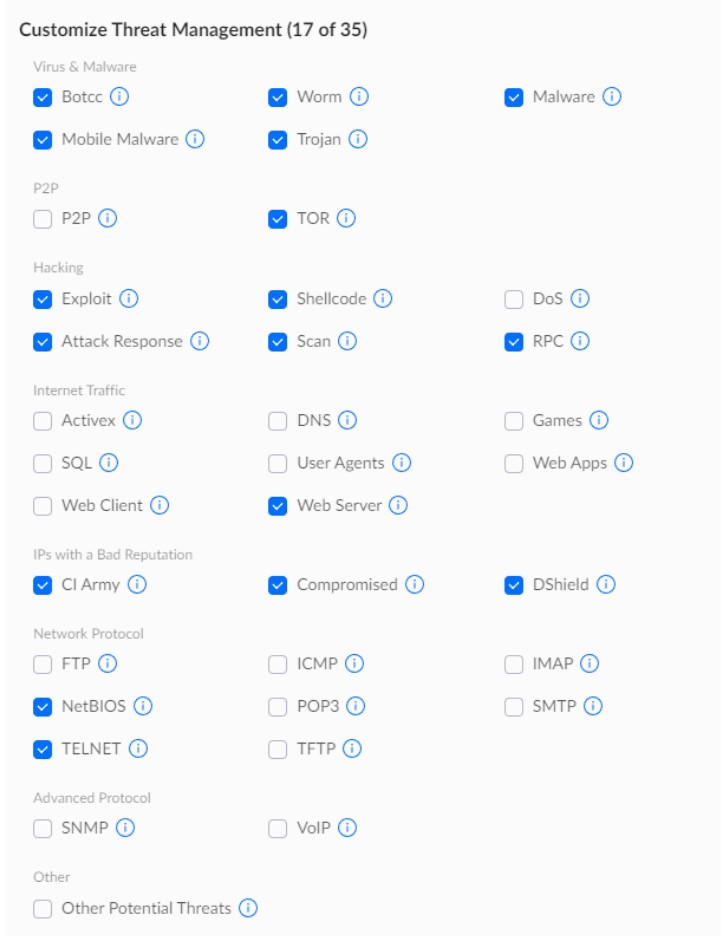
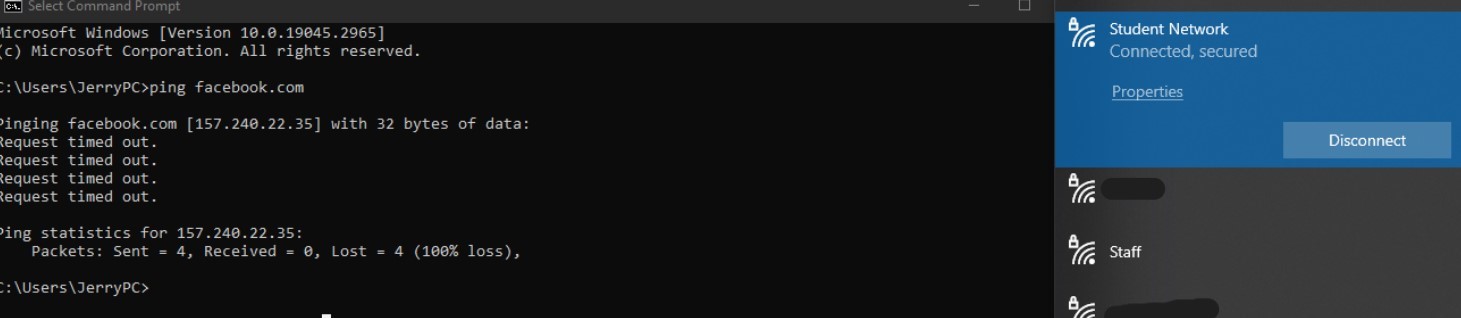
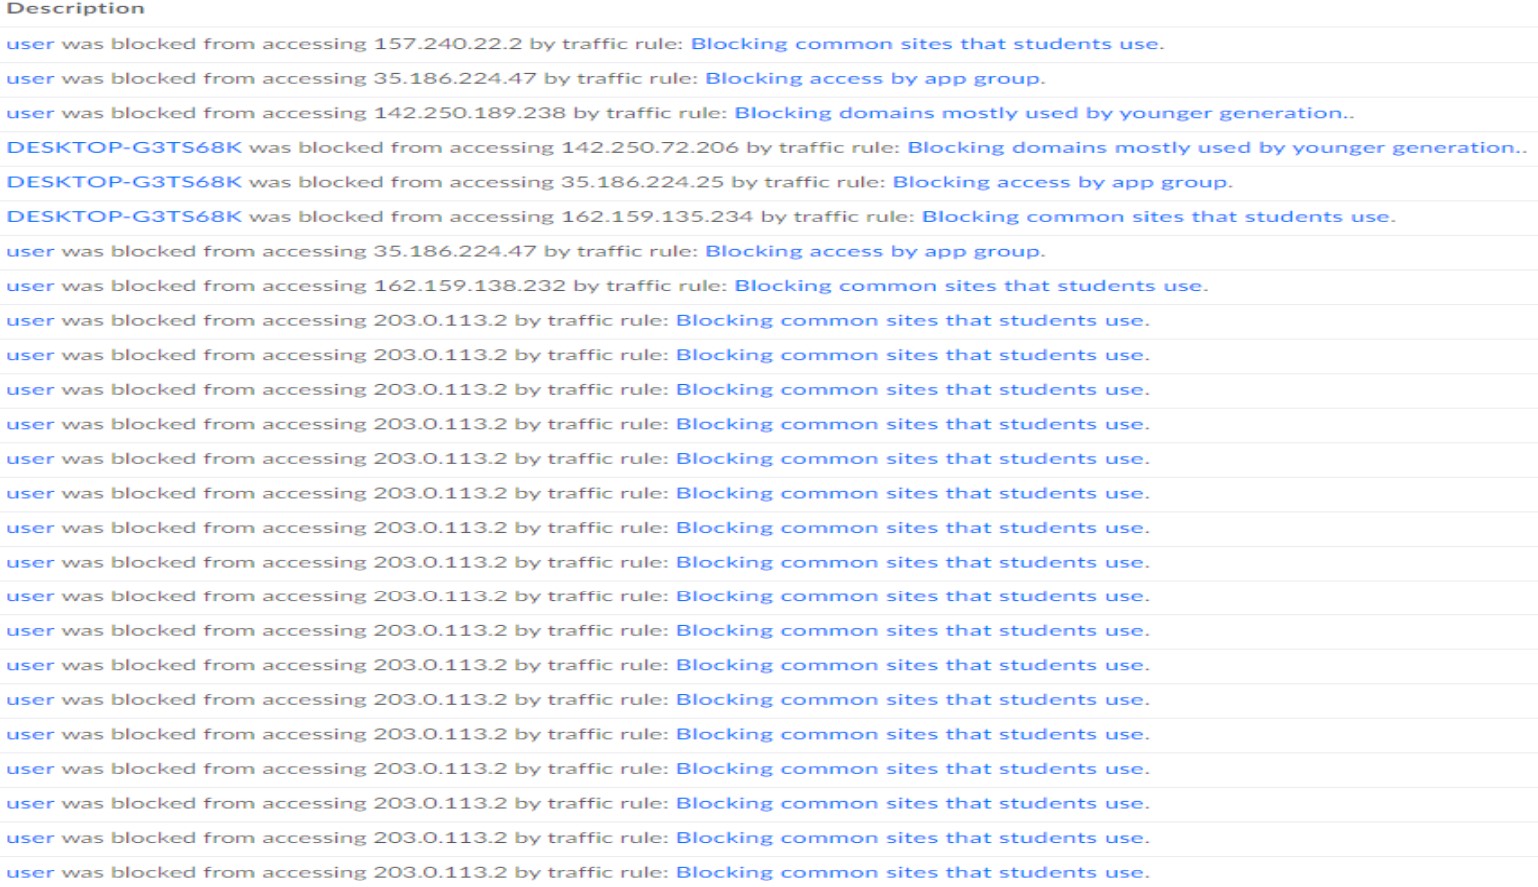
Blocking Common Sites:
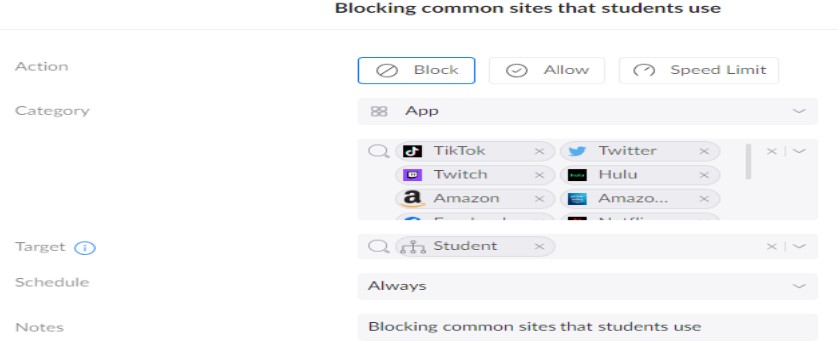
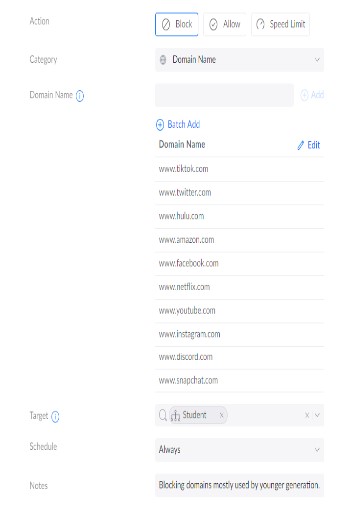
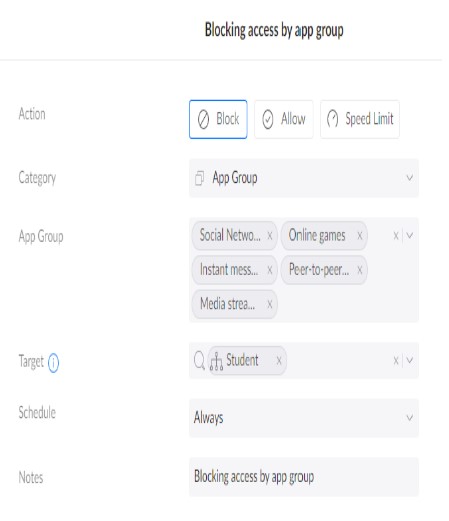
Blocking by Domain name/App Group:
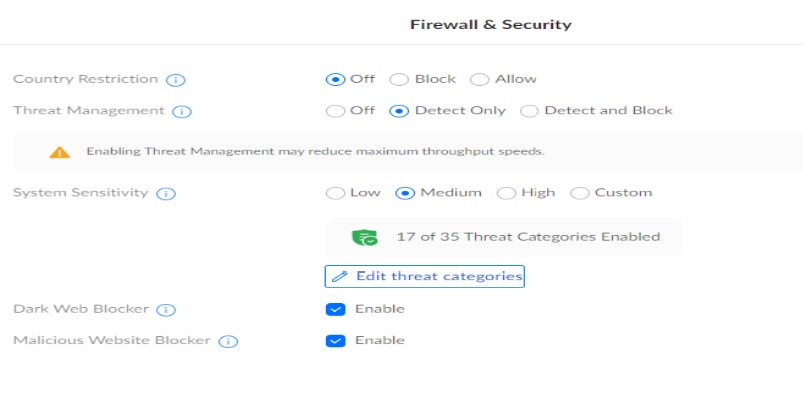
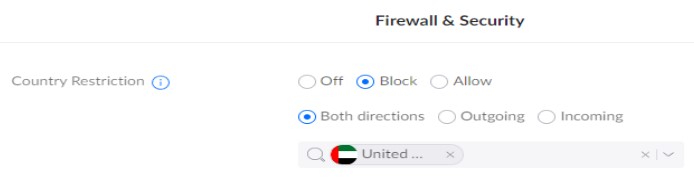
Setting up Firewall:
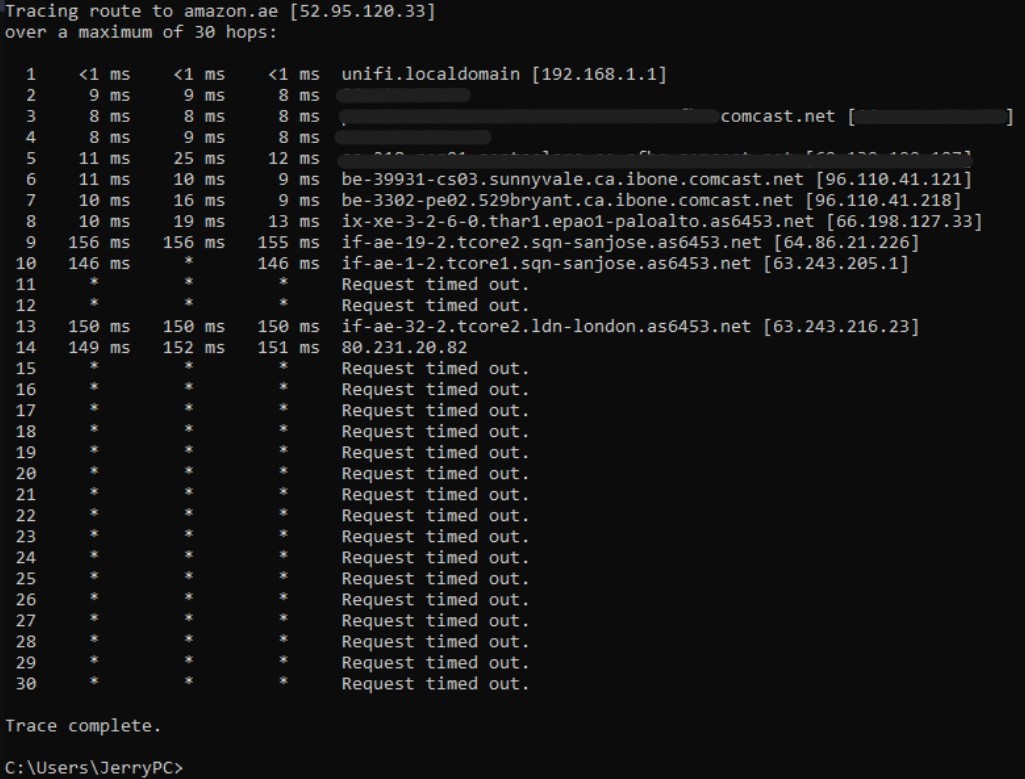
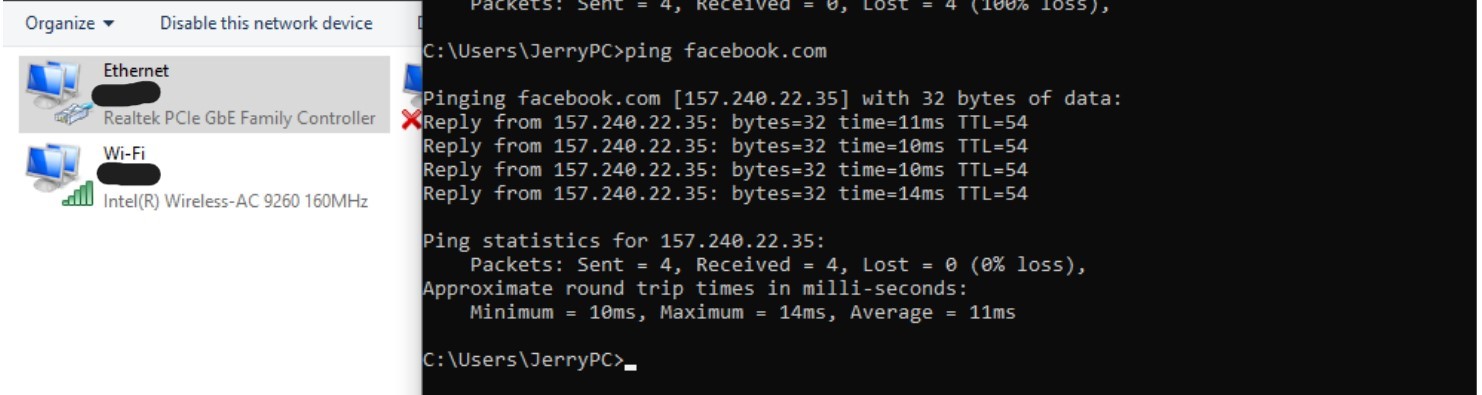
Filter on: Ethernet is disabled and connected to the student network.
System log notification:
Summary:
This project began in April 2021, during spring break. It took about two weeks of work, but the experience was well worth it. Of course, I didn’t do it all alone. My dad helped whenever he had free time on the weekends.
In the end, every device in our home with an Ethernet port is now connected via Ethernet cable, providing a stable 1G network speed. Our household can now support over 30 devices simultaneously without any connection issues since the network installation.